• Home
  • Designs
  • Decor
  • Beauty
  • Stationery
  • Themes
  • Photography & Videography
  • Wedding Cakes
  • Wedding Outfits
  • Jewelry & Accessories
Wed Blooms
Wedding Design and Decor Ideas Made Simple!
Home - Decor
Category:

Decor

This category covers decor ideas, table styling, floral decor, and lighting decor. It explains how decorative elements are placed to support balance, clarity, and visual consistency.
Decor

11 Fairy Light Wedding Backdrop Ideas That Glow

by Emma Carter October 22, 2026
written by Emma Carter

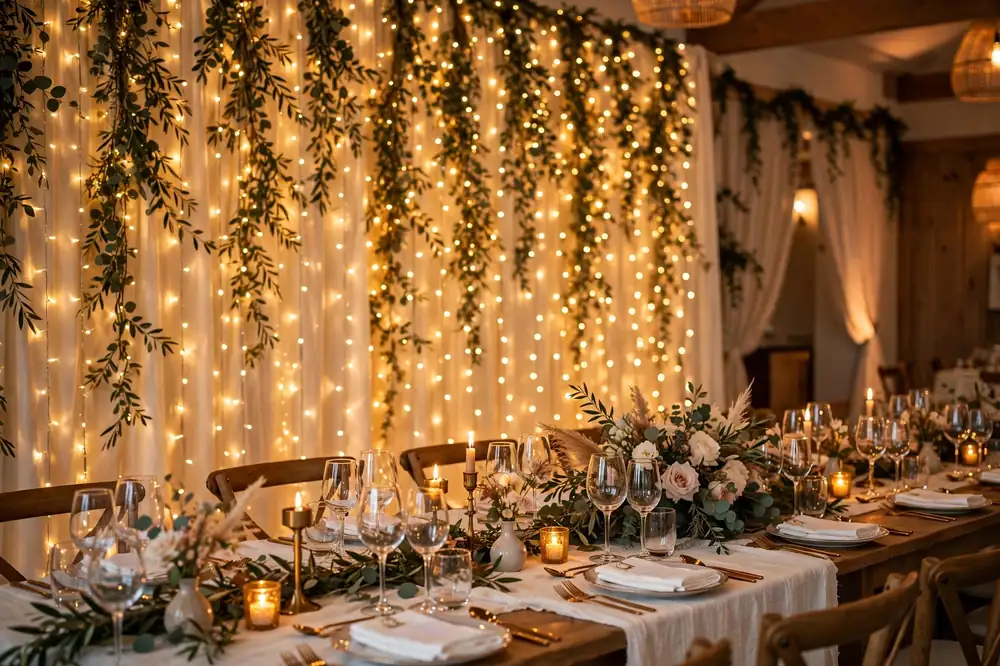
Fairy lights never go out of style, and there are more ways to hang them as a backdrop than most couples realize. Each arrangement below creates a different mood, from a soft glow behind the ceremony to a full starry wall for photos.

A backdrop also solves a practical problem. It gives your photographer a beautiful, well-lit background and hides whatever is behind it. Here are 11 distinct ways to arrange fairy lights as a backdrop.

Curtain Wall of Lights
Curtain wall of warm fairy lights

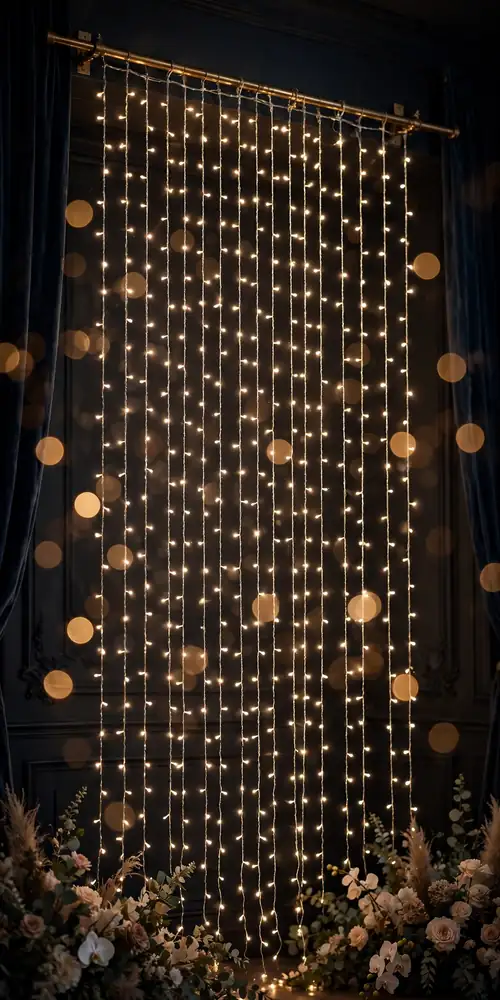
Rows of fairy light strings hung side by side from a horizontal rod or pipe, falling straight down like a glowing curtain. This is the simplest backdrop on the list and one of the most photographed. Use warm white lights rather than cool white. Warm reads as romantic while cool reads as office lighting. Hang about one string every four inches for a full curtain with no gaps. Styling tip: plug the strings into a single power strip behind the curtain and hide it with a drape of fabric. One visible cord ruins the magic.

Lights Behind Sheer Fabric
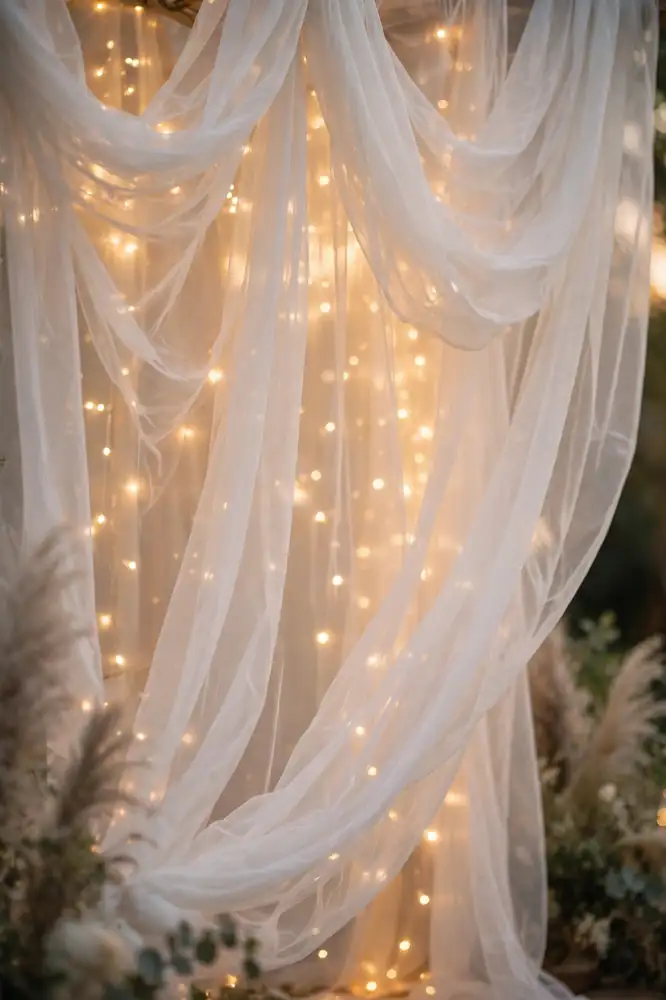
Fairy lights glowing behind sheer white fabric

Fairy lights hung on a frame with a layer of sheer white voile hung a few inches in front of them. The fabric diffuses the pinpoints of light into a soft, even glow. This looks dreamy behind the head table or the ceremony arch. Keep the fabric six inches in front of the lights so the glow spreads without the fabric touching the bulbs. LED lights stay cool, which makes this safe with fabric. Styling tip: gather the fabric in loose folds instead of pulling it flat. The folds catch the glow differently and add depth to photos.

Starry Photo Booth Wall
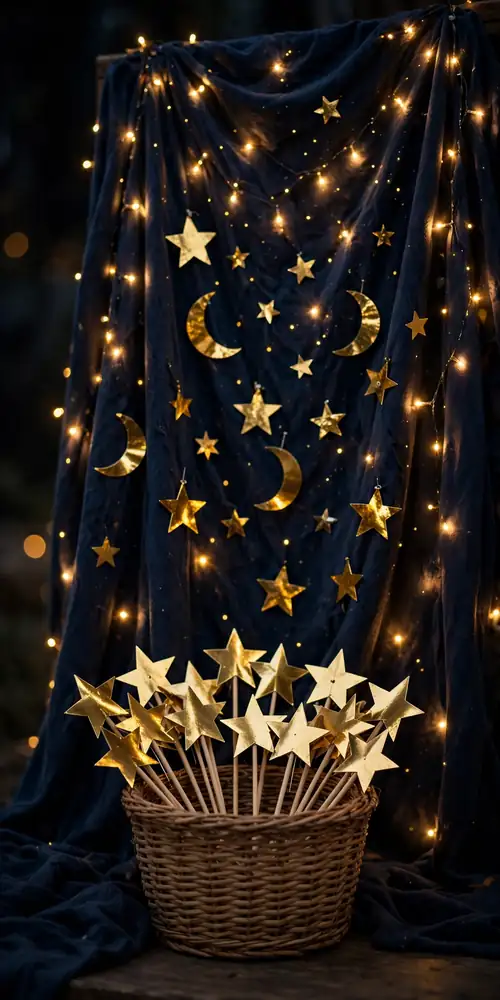
Starry fairy light photo booth wall

A dark navy or black fabric backdrop covered in fairy lights plus stick-on star and moon cutouts in gold foil. Guests step in front of it and look like they are standing in a night sky. This works best indoors or after sunset outdoors, since the dark fabric needs low light to read. Add a basket of simple props like star wands and gold crowns. Styling tip: use the twinkle setting on one or two strings and keep the rest steady. A few blinking lights suggest stars without looking chaotic.

Tree Canopy of Lights
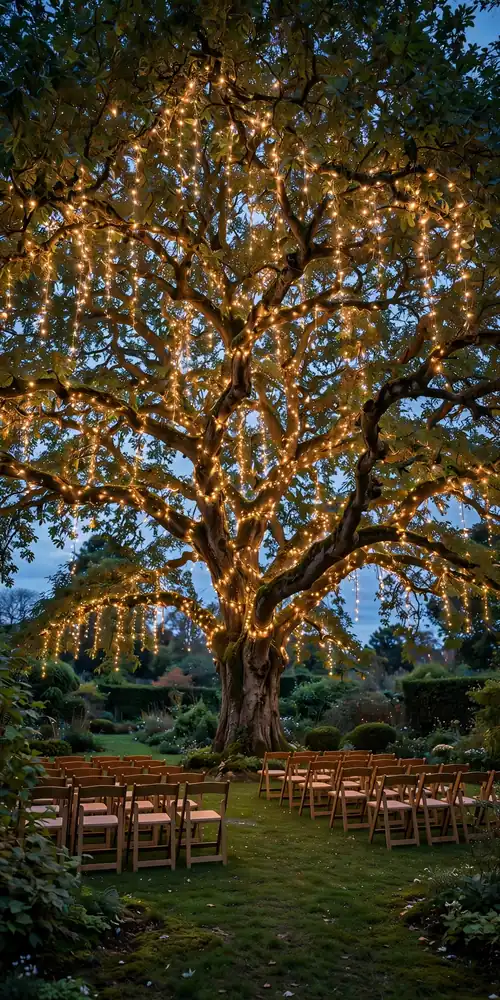
Fairy lights wrapped in a tree canopy

Fairy lights wrapped around the branches of a large tree or strung between several trees to form a glowing canopy overhead. This is the best outdoor option on the list because the trees do the structural work for you. Solar-powered strings avoid the need for extension cords across the lawn. Wrap the lights from the trunk outward along the main branches rather than just dangling them. Styling tip: add the lights at dusk and look at them from the seating area. Adjust any strings that glow brighter than the rest so the canopy looks even.

Mason Jar Light Clusters
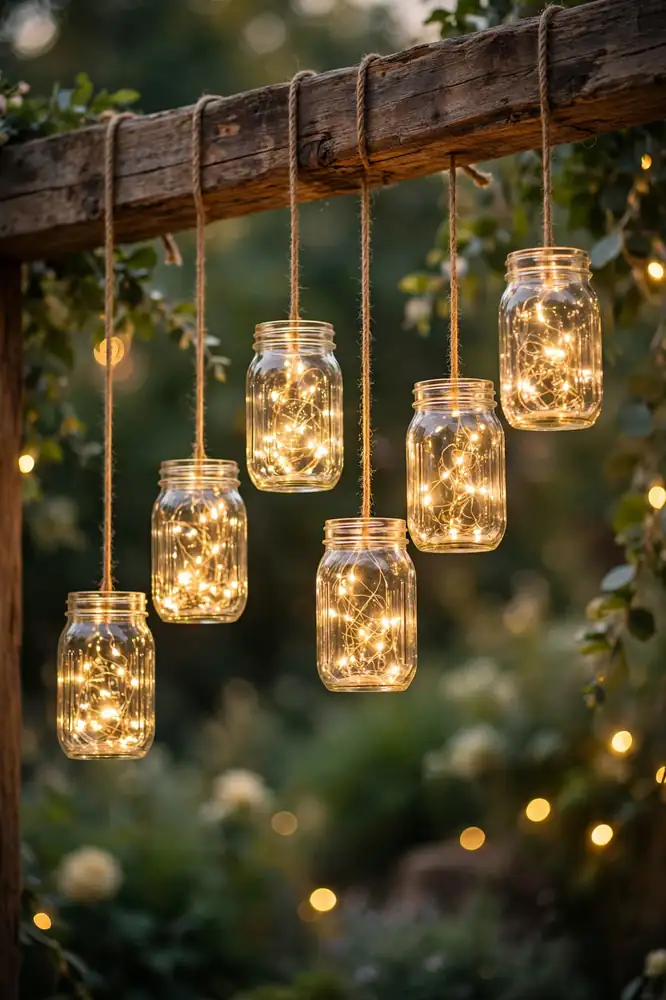
Mason jars filled with fairy lights hanging

Fairy lights stuffed into glass mason jars, with the jars hung at different heights from a branch, a beam, or a metal frame. Each jar becomes a glowing lantern, and the cluster of jars reads as a backdrop behind the sweetheart table. Use battery-operated light strings with tiny battery packs that hide inside the jar lids. Hang three to seven jars for a good cluster. Styling tip: hang the jars at clearly different heights, at least six inches apart vertically. Evenly hung jars look flat, while varied heights look like floating lights.

Light Rain From a Beam
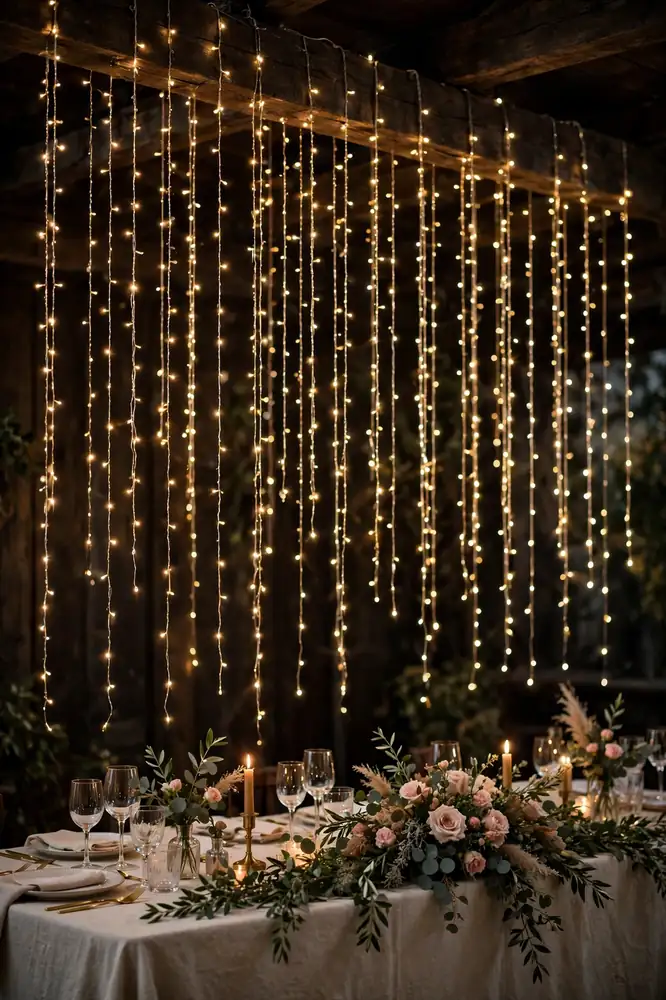
Fairy lights falling like rain from a beam

Long strings of fairy lights hung vertically from a ceiling beam, a tent pole, or a metal arch so they fall like glowing rain. This creates a wall of light that moves gently in the breeze. Use icicle-style light strands if you want a natural uneven look, or straight strands for a clean look. Secure each string with a small zip tie so wind does not tangle them together. Styling tip: stand the couple or the head table a few feet in front of the rain, not under it. The lights become a glowing background instead of hanging over their heads.

Lights With Paper Lanterns
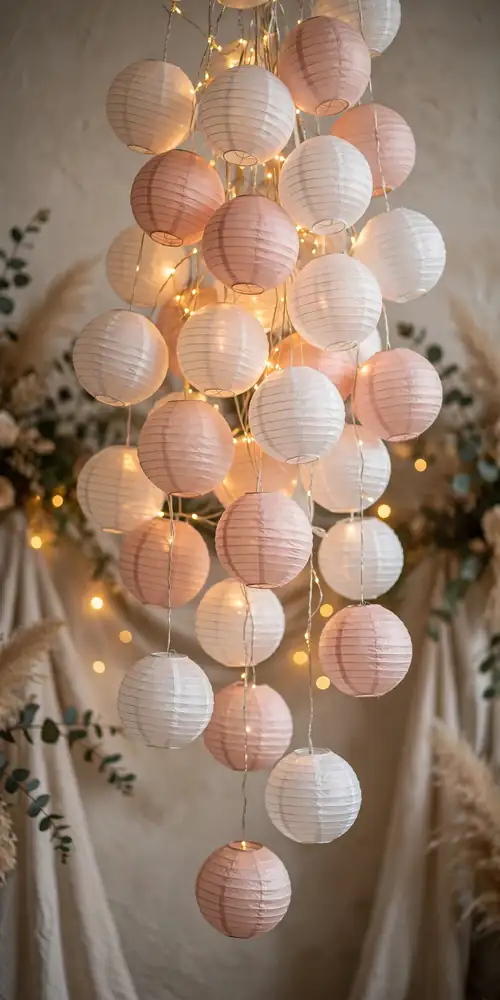
Fairy lights woven through paper lanterns

Fairy lights woven through a cluster of small round paper lanterns in white and blush, hung at different heights to form a soft glowing wall. The lanterns spread the light and add color, while the fairy lights fill the gaps between them. This suits indoor receptions and covered patios. Paper lanterns cannot handle rain. Hang about twelve to eighteen lanterns for a full backdrop. Styling tip: mix two lantern sizes. The size difference keeps the cluster from looking like a grid.

Mirrored Glow Wall
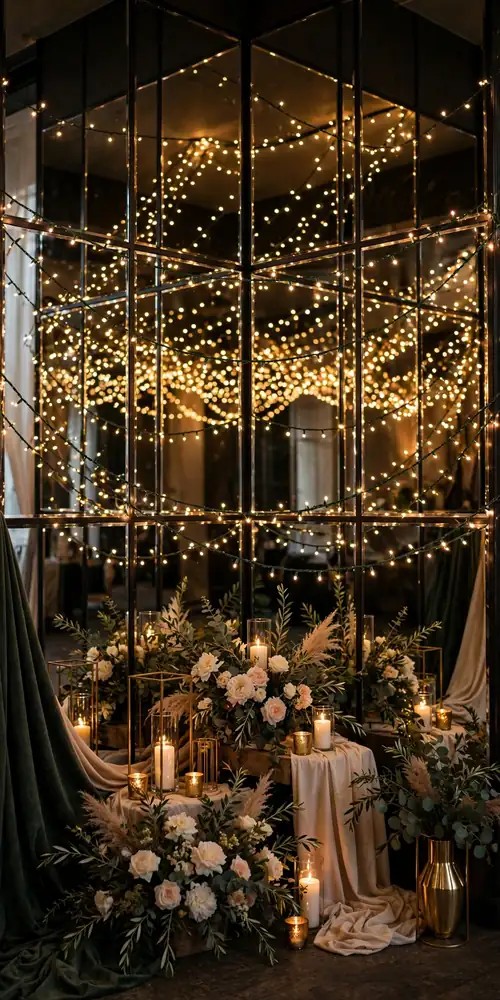
Mirrored wall doubling fairy light glow

A large mirror or mirrored panels set behind strings of fairy lights so the lights reflect and double the glow. This looks dramatic in photos and makes a small space feel bigger. Rent mirror panels from a decor company rather than buying. Big mirrors are heavy and risky to move. Place the lights about a foot in front of the mirror so the reflection has depth. Styling tip: angle the mirrors slightly so they reflect the lights, not the guests or the ceiling fixtures. A quick test photo before the event shows you exactly what guests will see.

Tunnel Entrance of Lights
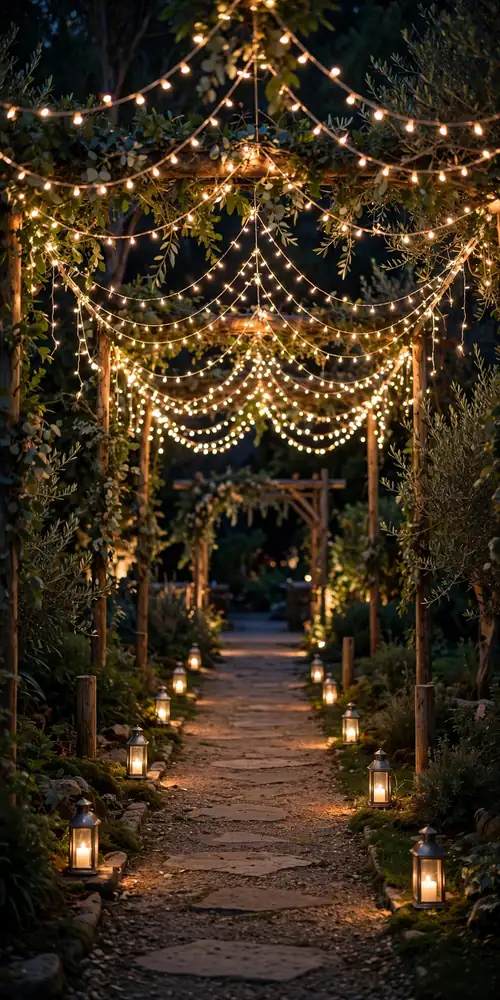
Tunnel of fairy lights over a walkway

Strings of fairy lights strung overhead along a walkway or entrance corridor so guests walk under a tunnel of light. This turns an ordinary entrance into an experience and sets the mood before anyone sees the main space. Drape the strings in gentle swags between poles or trees rather than pulling them straight. Add ground lanterns along the path edges to light feet as well. Styling tip: keep the tunnel short, about ten to fifteen feet. A short tunnel feels magical, while a long one feels like a hallway.

Lights Woven Into Greenery
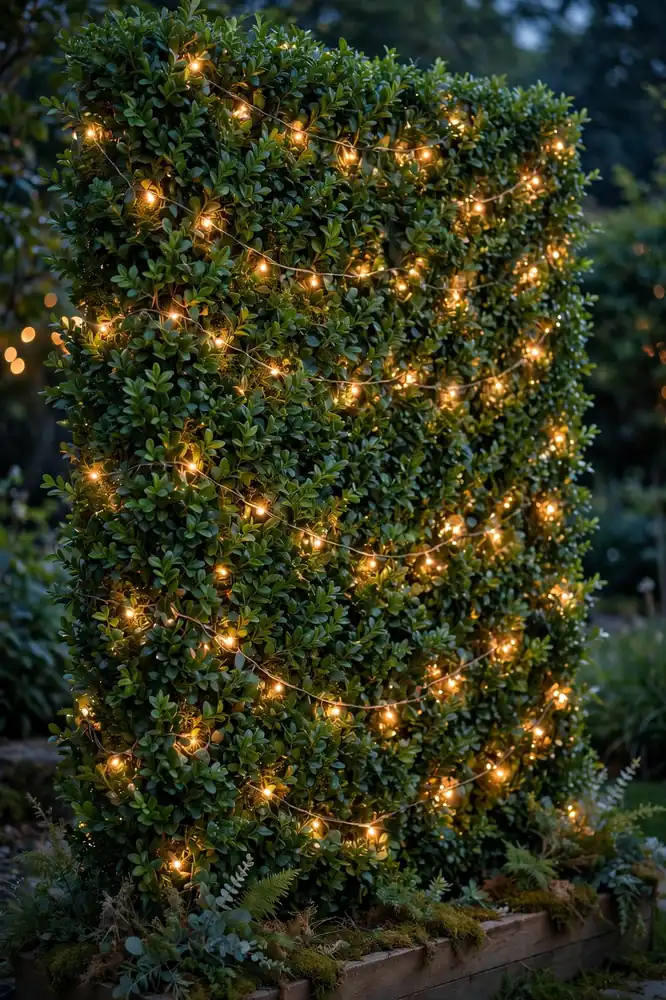
Fairy lights woven into a greenery wall

Fairy lights woven through a wall of greenery, either real garlands on a frame or a faux boxwood hedge wall. The lights glow through the leaves and make the greenery look alive after dark. This doubles as a photo backdrop and a decor piece. Use warm white lights so the greens look natural rather than blue. Push the light strings deep into the greenery so the bulbs hide and only the glow shows. Styling tip: add the lights before you fluff and arrange the greenery. It is much easier to hide wires under leaves than to push them through later.

Hanging Lights With Dried Florals
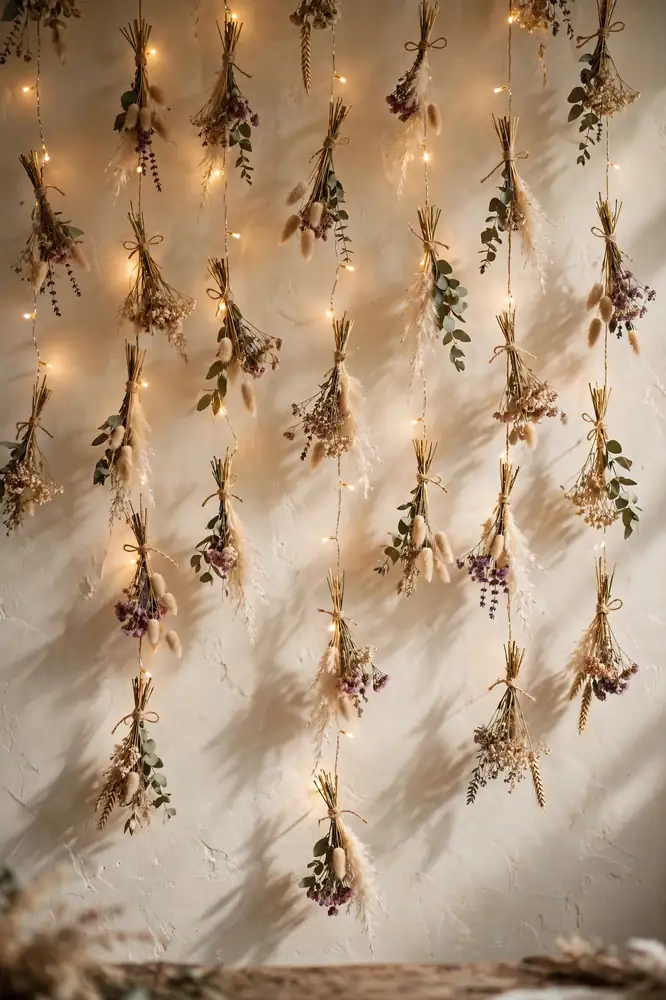
Fairy lights with hanging dried florals

Strands of fairy lights hung from above with dried flowers, grasses, and seed pods tied along them at intervals. The dried florals catch the warm light and cast soft shadows on the wall behind. This suits boho and rustic weddings and works for daytime receptions too, since the dried florals look good in daylight. Tie the dried pieces on with thin twine so they hang naturally among the lights. Styling tip: keep the florals small and sparse. One dried stem every foot or two is enough. Too many hides the lights.

Start with where the backdrop will stand, then pick the look that suits the light. Indoor spaces love the curtain wall and the mirrored glow. Outdoor spaces belong to the tree canopy and the tunnel entrance. And always test your lights at the actual time of day your event starts.
October 22, 2026 0 comments
0 FacebookTwitterPinterestEmail
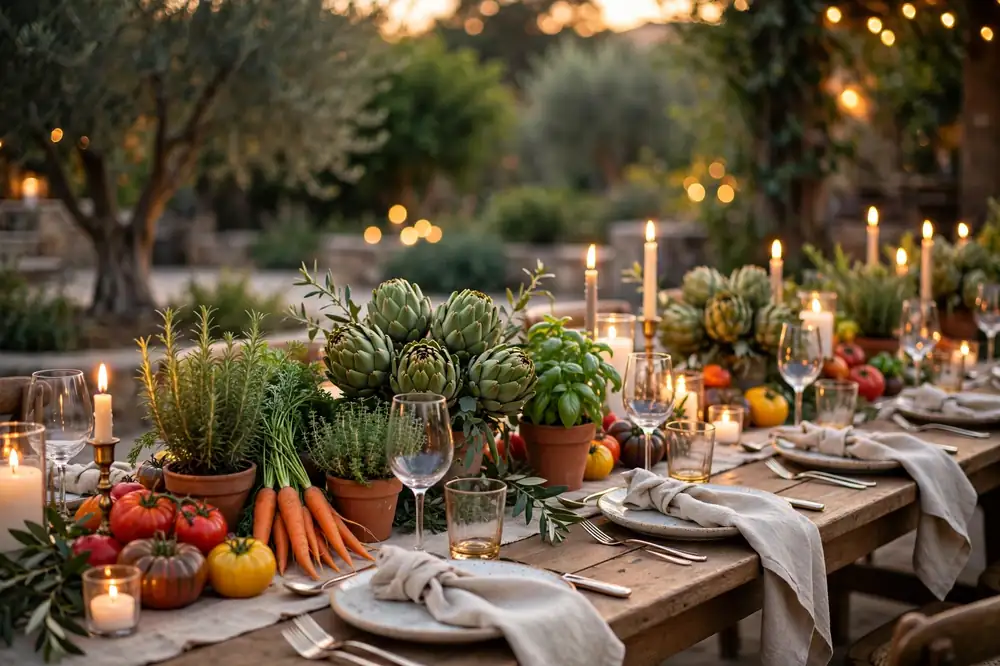
Vegetable centerpiece ideas on a wedding table
Decor

11 Vegetable Centerpiece Ideas That Look Fresh

by Emma Carter October 20, 2026
written by Emma Carter

Vegetables bring bold color, interesting texture, and sculptural shapes that flowers alone cannot give you, at a fraction of the cost of a big floral arrangement. Artichokes look modern and sculptural. Potted herbs feel right at a garden party. Pumpkins suit a fall harvest theme.

And because everything on the table is real food, guests can take the produce home at the end of the night. Here are 11 vegetable centerpiece ideas, each built around a different ingredient and style.

Artichoke Cluster Bowls

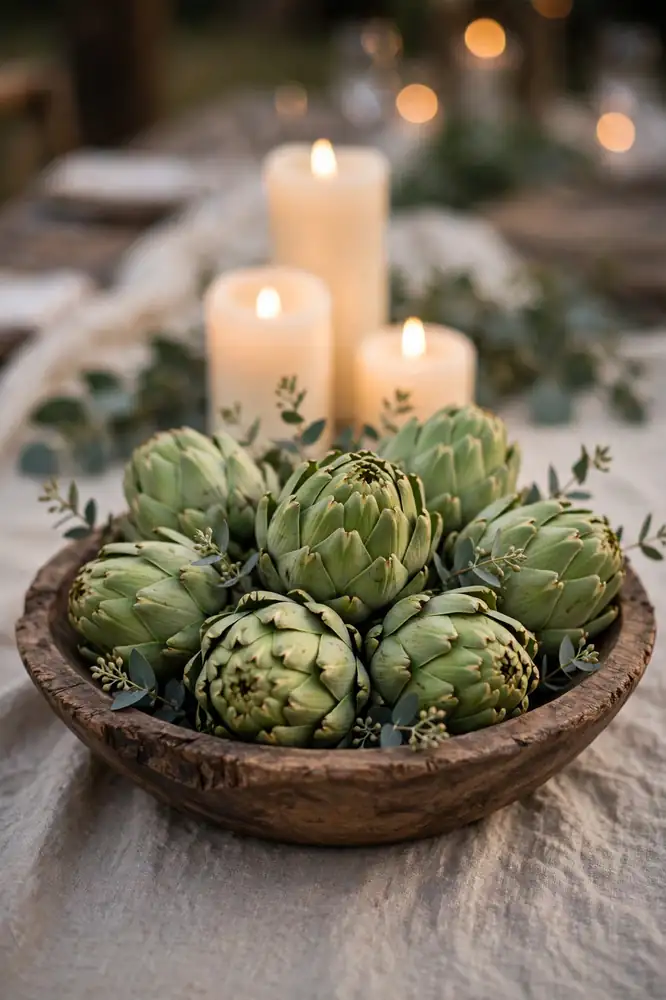
Artichokes piled in a wooden bowl with candles

Fresh green artichokes piled high in a low wooden or stone bowl, with a few sprigs of eucalyptus tucked between them. The layered, geometric shape of the artichoke looks almost like a flower, which is why this reads as a real centerpiece rather than a grocery display. Use two bowl sizes per table so the heights vary. One medium bowl per four guests is plenty. Buy the artichokes two days before the wedding and keep them cool and dry. Styling tip: tuck three unscented ivory pillar candles of different heights behind the bowl. The green against the warm candlelight looks expensive in photos.

Kale Leaf Runner

Curly kale leaf runner on a wedding table

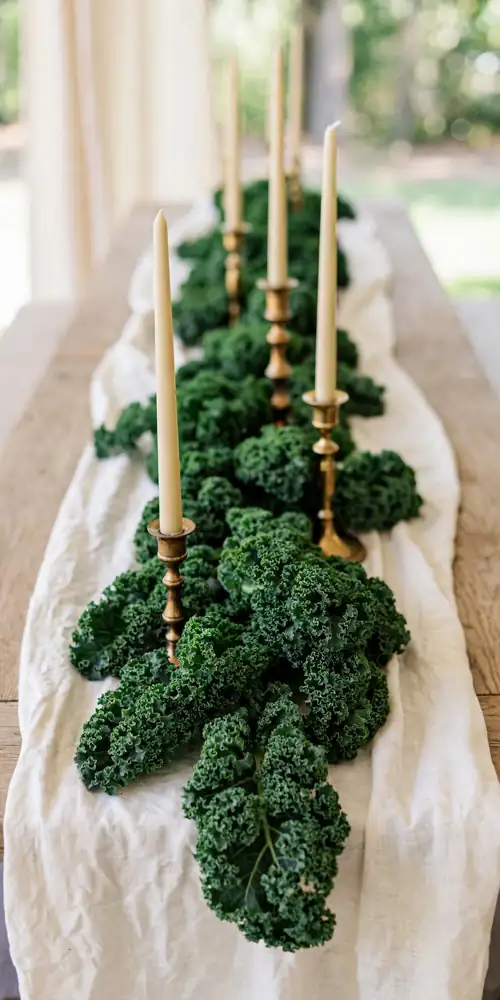
Bunches of dark green curly kale laid along the center of the table as a living runner, with the frilly leaves overlapping like a ruffled garland. Curly kale has more texture than flat kale, so choose the curly kind. Weave a few taper candles in brass holders through the greens so light rises out of the foliage. This works best on long farm tables where the runner can run the full length. Keep the kale misted with water until guests sit down so it stays perky. Styling tip: lay a narrow strip of cream linen under the kale first. The pale fabric makes the dark green pop instead of disappearing into a dark table.

Bunched Carrot Bouquets

Bunched carrots with green tops in a tall vase

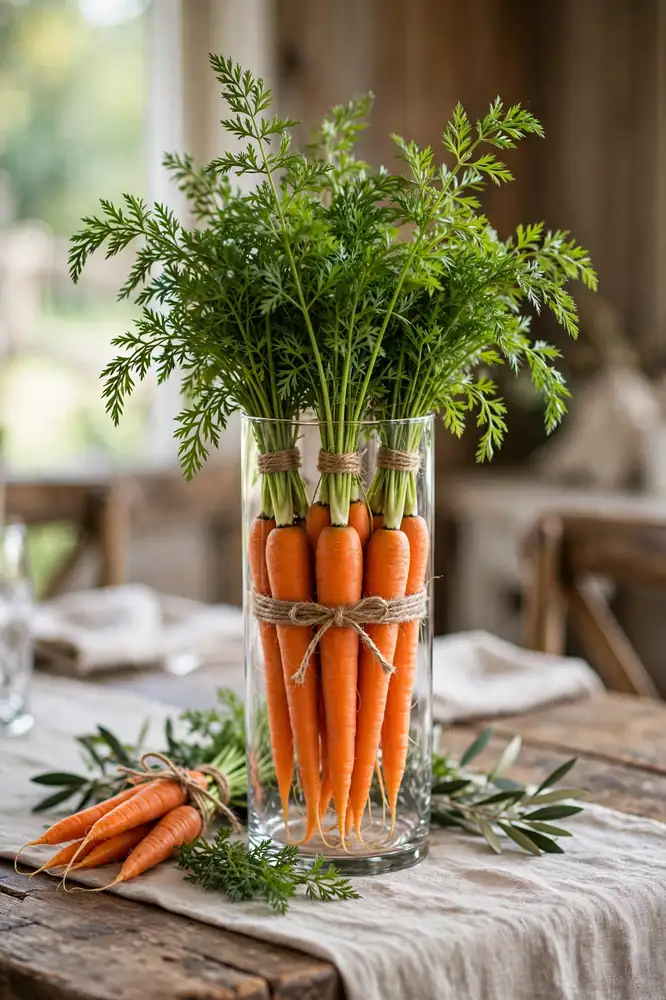
Bright orange carrots with their feathery green tops still attached, tied in bundles with twine and stood upright in tall glass or tin vases. The orange and green color combination looks cheerful and natural, like a farmers market stall in the best way. Ask your supplier for bunching carrots rather than bagged baby carrots, since only bunching carrots come with tops. One vase per table is enough. These are tall and make a statement on their own. Styling tip: trim the tops to about six inches and fan them out. Long floppy tops droop by dinner, but trimmed tops stay upright all night.

Mini Pumpkin Clusters

Mini pumpkins and gourds on a fall wedding table

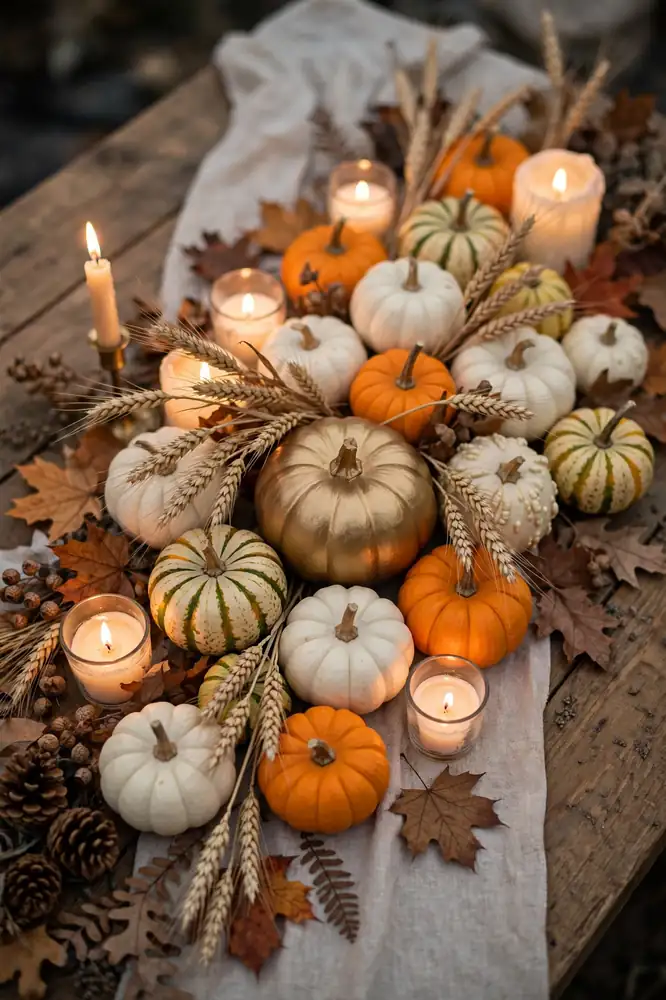
Mini pumpkins and small gourds in white, orange, and striped varieties scattered down the table in clusters of three to five, mixed with wheat stalks and dried leaves. The color range of real gourds is wider than most people expect. Mix sizes from golf-ball tiny to softball big for the best effect. Pumpkins keep for weeks, so buy them early when the selection is best. This is the classic fall look and it never feels tired when the colors vary. Styling tip: spray a few of the pumpkins with matte gold paint and leave the rest natural. The painted ones catch the light while the natural ones keep the table grounded.

Potted Herb Trios

Potted rosemary thyme and basil in burlap wraps

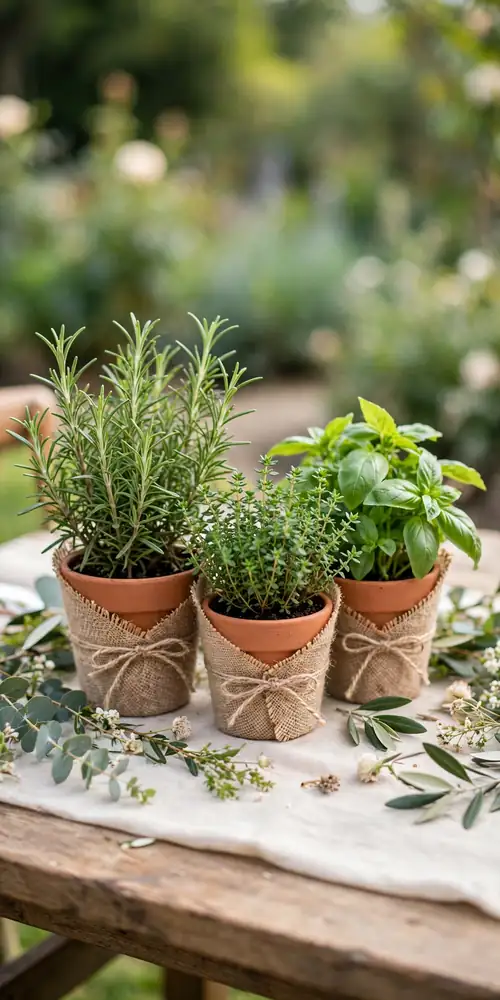
Small terracotta pots of fresh rosemary, thyme, and basil grouped in threes down the middle of each table. The herbs smell wonderful when guests brush past them, which no flower arrangement can do. Buy established plants from a garden center rather than small grocery-store pots, since the grocery pots are often root-bound and droop fast. Water them the morning of the wedding. These double as favors because guests love taking a live plant home. Styling tip: wrap each pot in a square of burlap tied with twine. The burlap hides plastic nursery pots and gives the whole table a finished look.

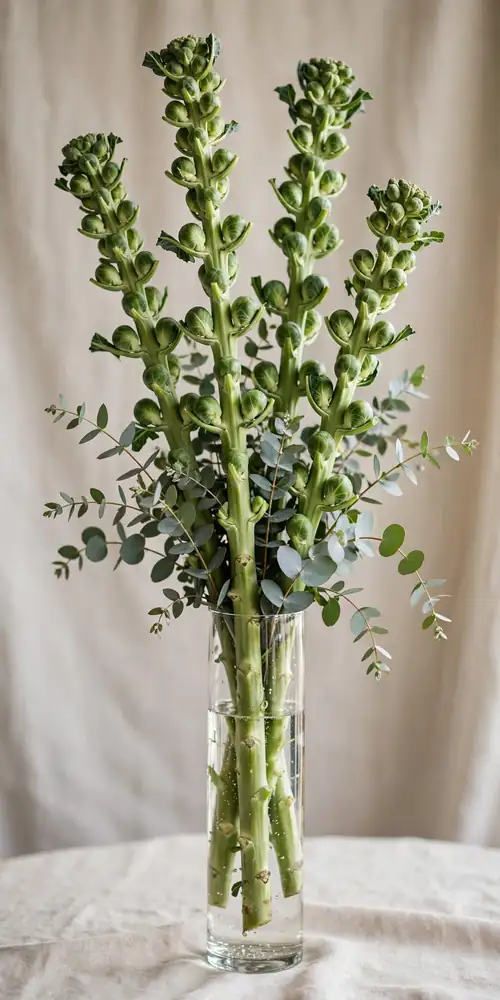
Brussels Sprout Stalks

Brussels sprout stalks in a tall narrow vase

Whole brussels sprout stalks, the tall woody stems with the round sprouts still attached, stood upright in tall narrow vases like unusual flowers. Guests rarely recognize what they are at first glance, which makes this a great conversation starter. The stalks are about two feet tall, so they add real height to a table without blocking conversation the way tall florals can. Farm suppliers sell them in fall. Ask for the freshest stalks you can get. Styling tip: mix in a few stems of seeded eucalyptus. The soft silver green fills the gaps between stalks and makes the whole thing look designed.

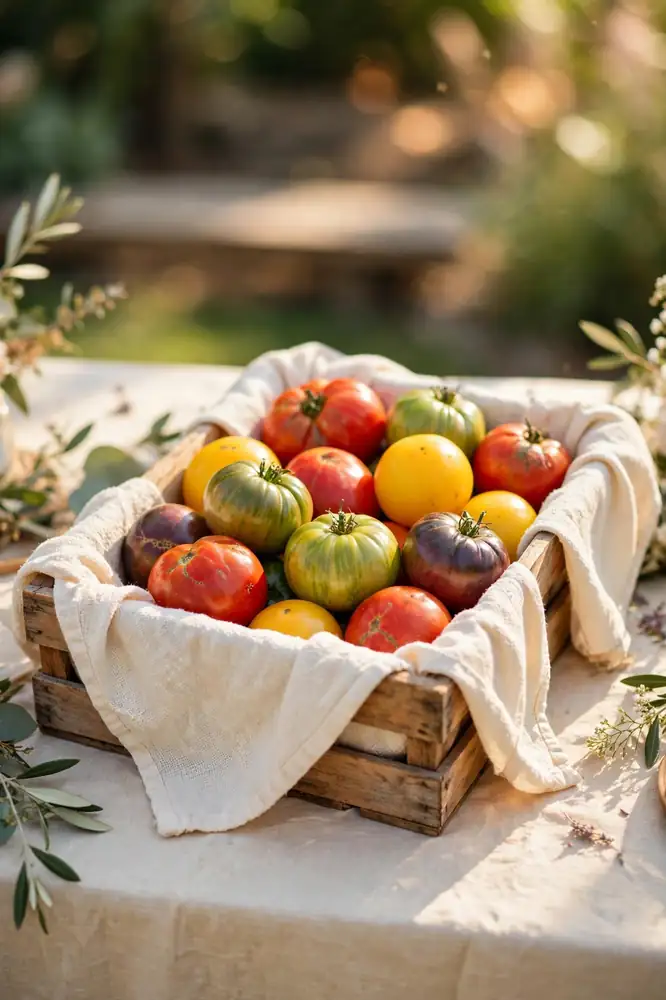
Heirloom Tomato Crates

Heirloom tomatoes in a wooden crate

Shallow wooden crates filled with heirloom tomatoes in red, yellow, green, and purple, set flat along the table. The color variety is the whole point, so buy mixed heirloom packs rather than a single variety. This suits summer weddings and pairs well with a farm-to-table menu. Keep the tomatoes at room temperature, never refrigerated, so they look glossy and ripe. One crate serves a six-person table. Styling tip: line the crate with a clean flour-sack towel. It keeps the wood from staining and adds a soft layer under the bright tomatoes.

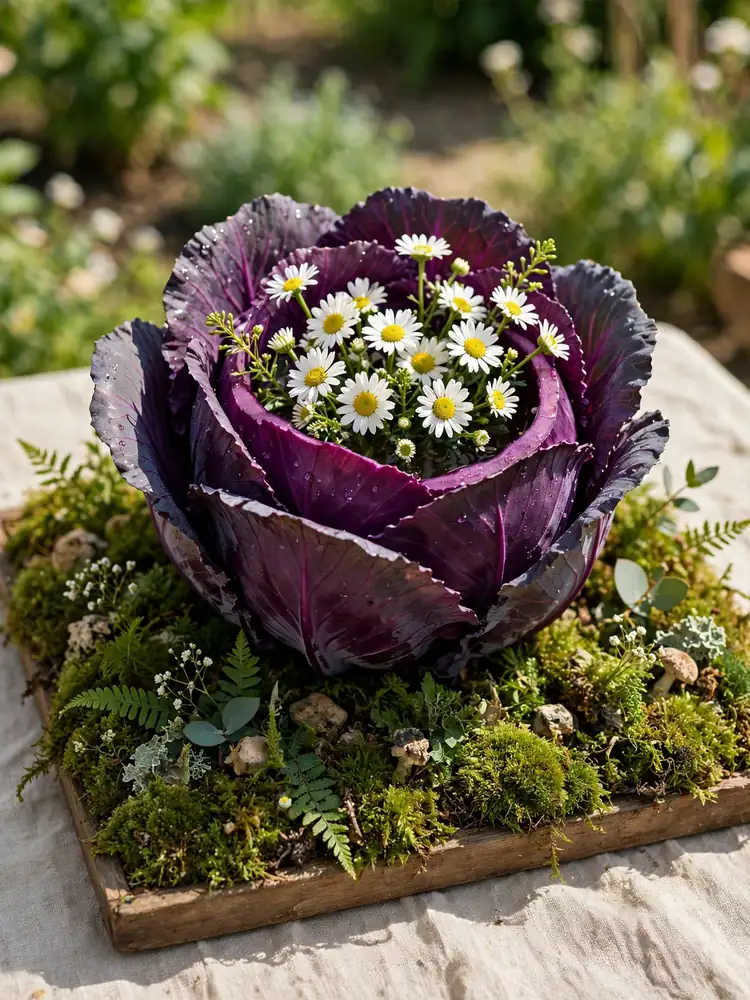
Hollowed Cabbage Vases

Purple cabbage used as a vase with daisies

Purple cabbage heads hollowed out and used as vases, filled with water and short-stemmed flowers like daisies. The ruffled purple leaves look like giant blooms themselves, and the round shape is easy to work with. Cut a flat base on each cabbage so it sits steady. Use real flowers inside rather than more vegetables for the prettiest contrast. Even simple daisies work. This idea suits playful, colorful weddings. Styling tip: tuck the cabbage into a bed of green moss on a low tray. The moss hides the flat cut base and makes the cabbage look like it grew there.

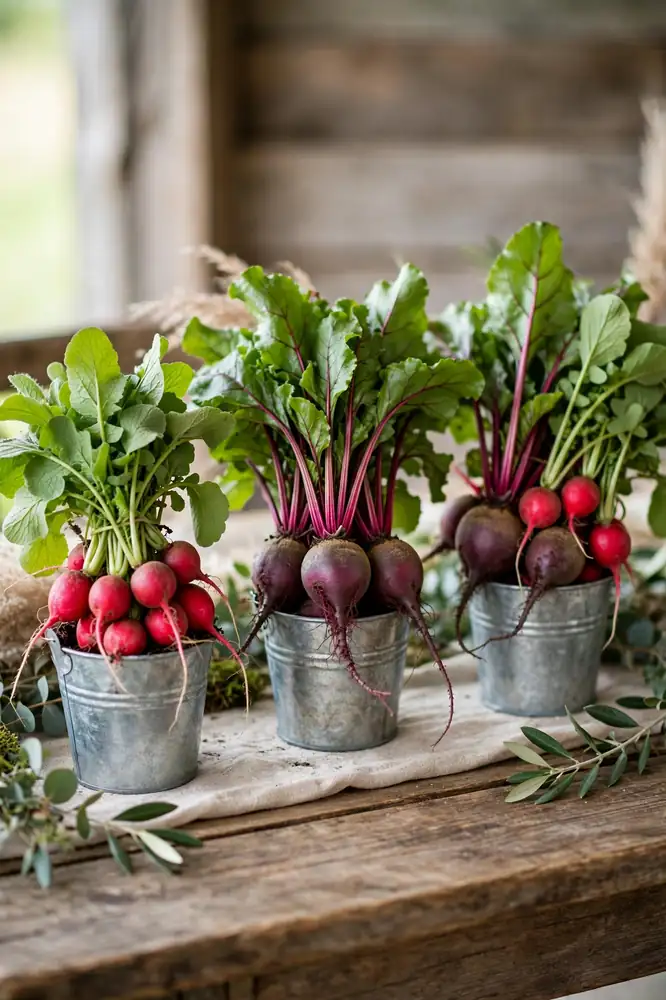
Radish and Beet Buckets

Radishes and beets in tin buckets

Bunches of bright red radishes and deep red beets with their leafy tops on, arranged upright in small galvanized tin buckets. The reds are rich and the greens are fresh, and the tin buckets give everything a rustic, kitchen-garden feel. Buy the vegetables the day before so the tops stay crisp. One bucket per table is plenty. They are colorful enough to carry the look alone. Styling tip: wrap a wide strip of kraft paper around each bucket and write the table number on it with a marker. This turns the centerpiece into your table-number display too.

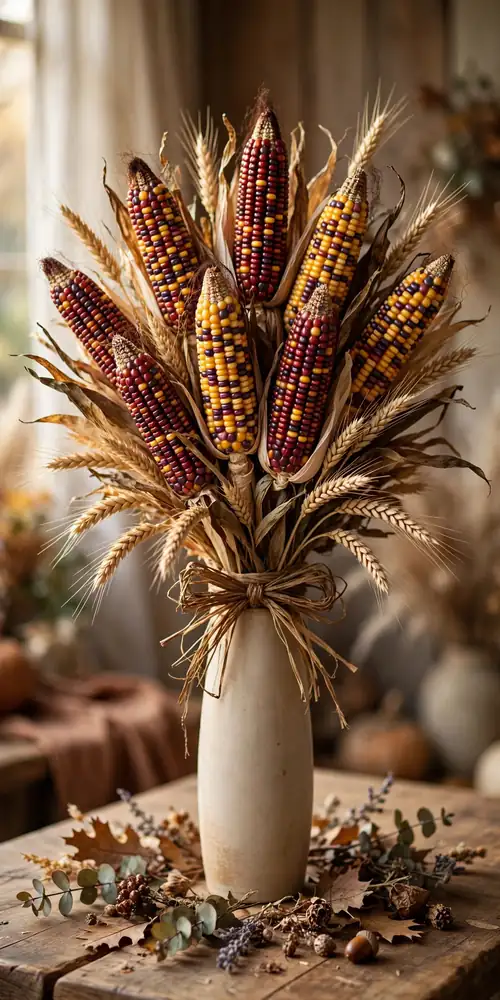
Corn and Wheat Sheaves

Dried ornamental corn and wheat sheaf

Dried ornamental corn in red, yellow, and purple kernels tied into sheaves with wheat stalks and raffia, stood in tall vases. This is a harvest-season classic with colors no flower can match. Buy ornamental corn from a farm supplier or craft store in fall, when it is easy to find. Dried corn keeps for months, so it can be prepared well ahead of time. Styling tip: fan the sheaves outward from a single tie point like a bouquet. A flat fan shape shows off the kernel colors better than a round bundle.

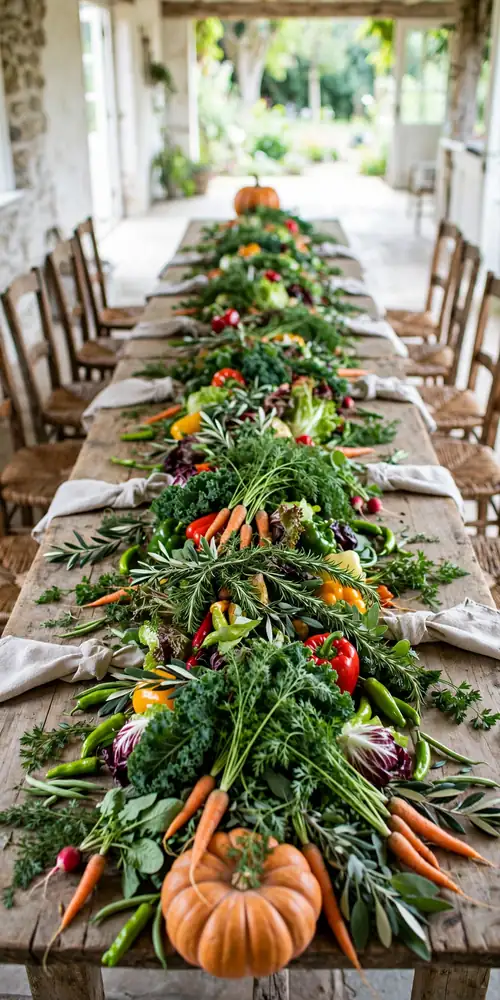
Harvest Runner

Harvest vegetable runner on a farmhouse table

A full-length table runner made of mixed vegetables. Leafy greens go down the center, with clusters of peppers, carrots, onions, and herbs layered on top, spilling to the table edges. This is the most generous look on the list and suits farmhouse weddings and long banquet tables. Build it on a strip of kraft paper for easy cleanup. Anchor the ends with a small pumpkin or a pot of herbs. Styling tip: place the biggest vegetables in the middle and taper to smaller ones at the ends. The shape draws the eye along the whole table.

Pick the vegetable that matches your season and your menu, and build from there. Summer calls for tomatoes and herbs. Fall calls for pumpkins and corn. And whatever you choose, keep one thing in mind: real food always looks better than fake flowers trying to imitate it.

October 20, 2026 0 comments
0 FacebookTwitterPinterestEmail
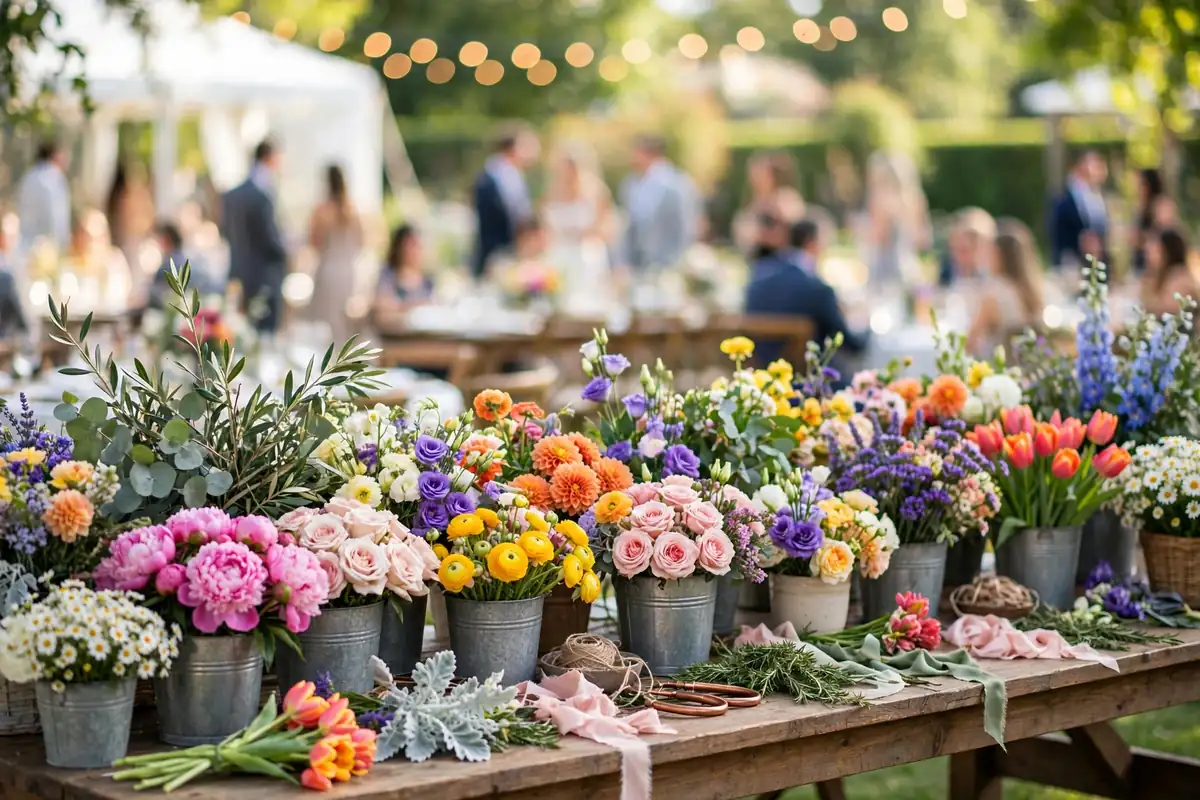
Flower bar wedding setup ideas
Decor

11 Flower Bar Wedding Ideas Guests Will Love

by Emma Carter October 18, 2026
written by Emma Carter

A flower bar is part decor, part entertainment. Guests build their own bouquets, crowns, or bud vases, and the flowers double as your decoration. It fills an empty corner with color and gives people something fun to do between the ceremony and dinner.

A good flower bar needs three things: a sturdy table or wall, vessels with water (or no water, for dried flowers), and clear little signs telling guests what to do. Here are 11 setups that actually work.

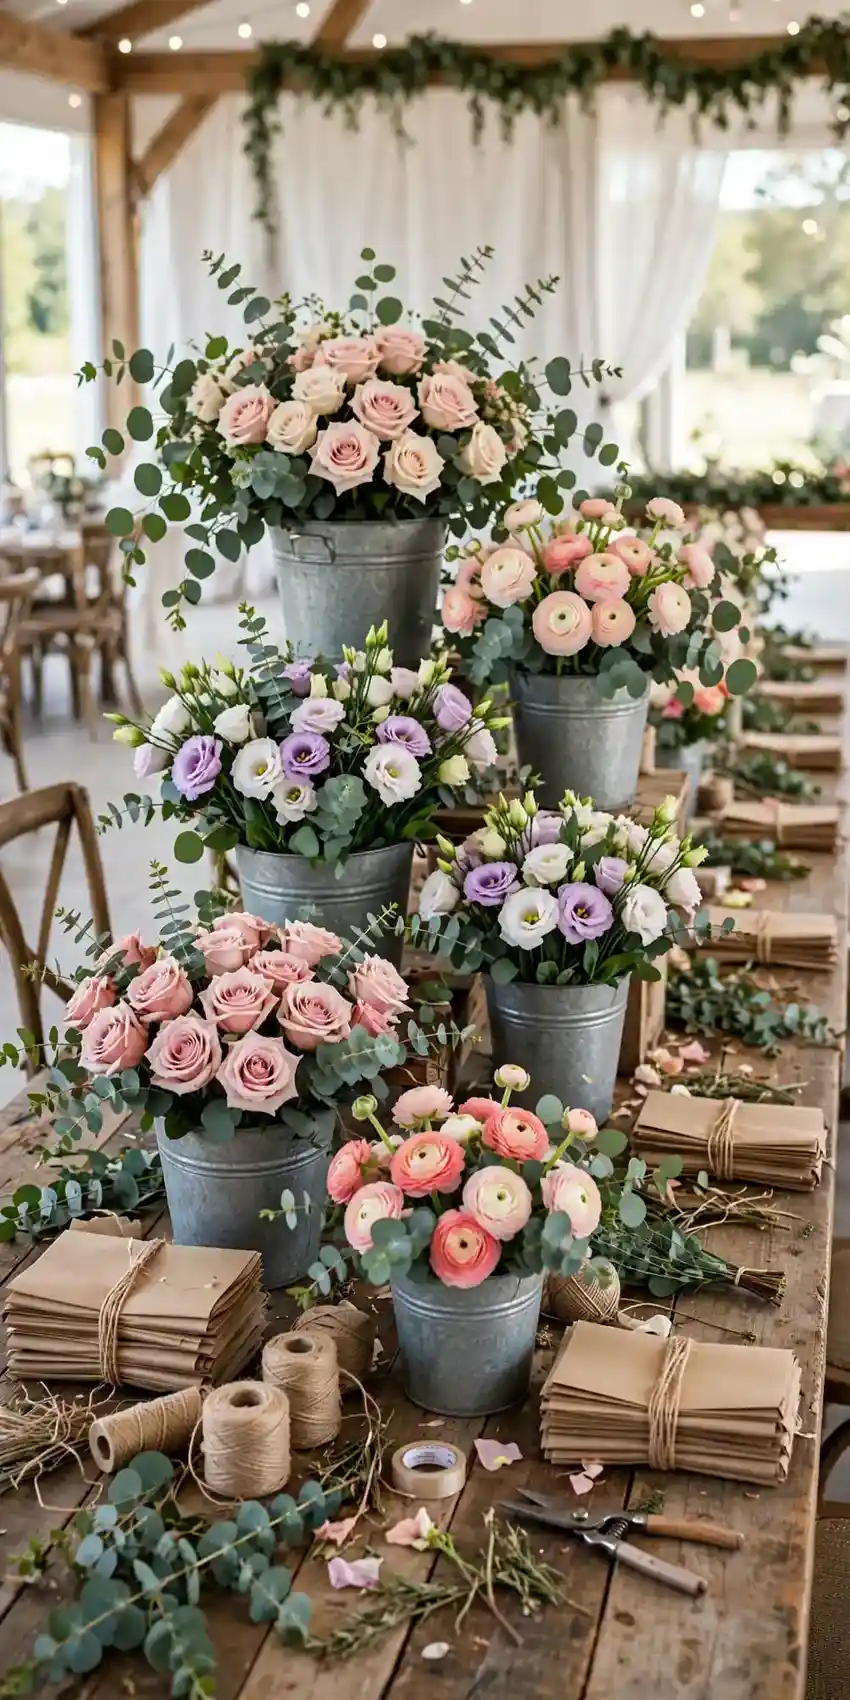
DIY Bouquet Bar

DIY bouquet bar with flower buckets

A long farm table lined with galvanized buckets, each holding a different flower: roses, ranunculus, lisianthus, spray roses, and eucalyptus for filler. Guests pick stems and wrap them in kraft paper to take home. Buy flowers wholesale two days before the wedding and store them in a cool room. You need about 8 to 10 stems per guest. Styling tip: put the greenery buckets at both ends of the table. Guests naturally start with greens as a base, which makes every bouquet look fuller.

Bud Vase Pegboard Wall

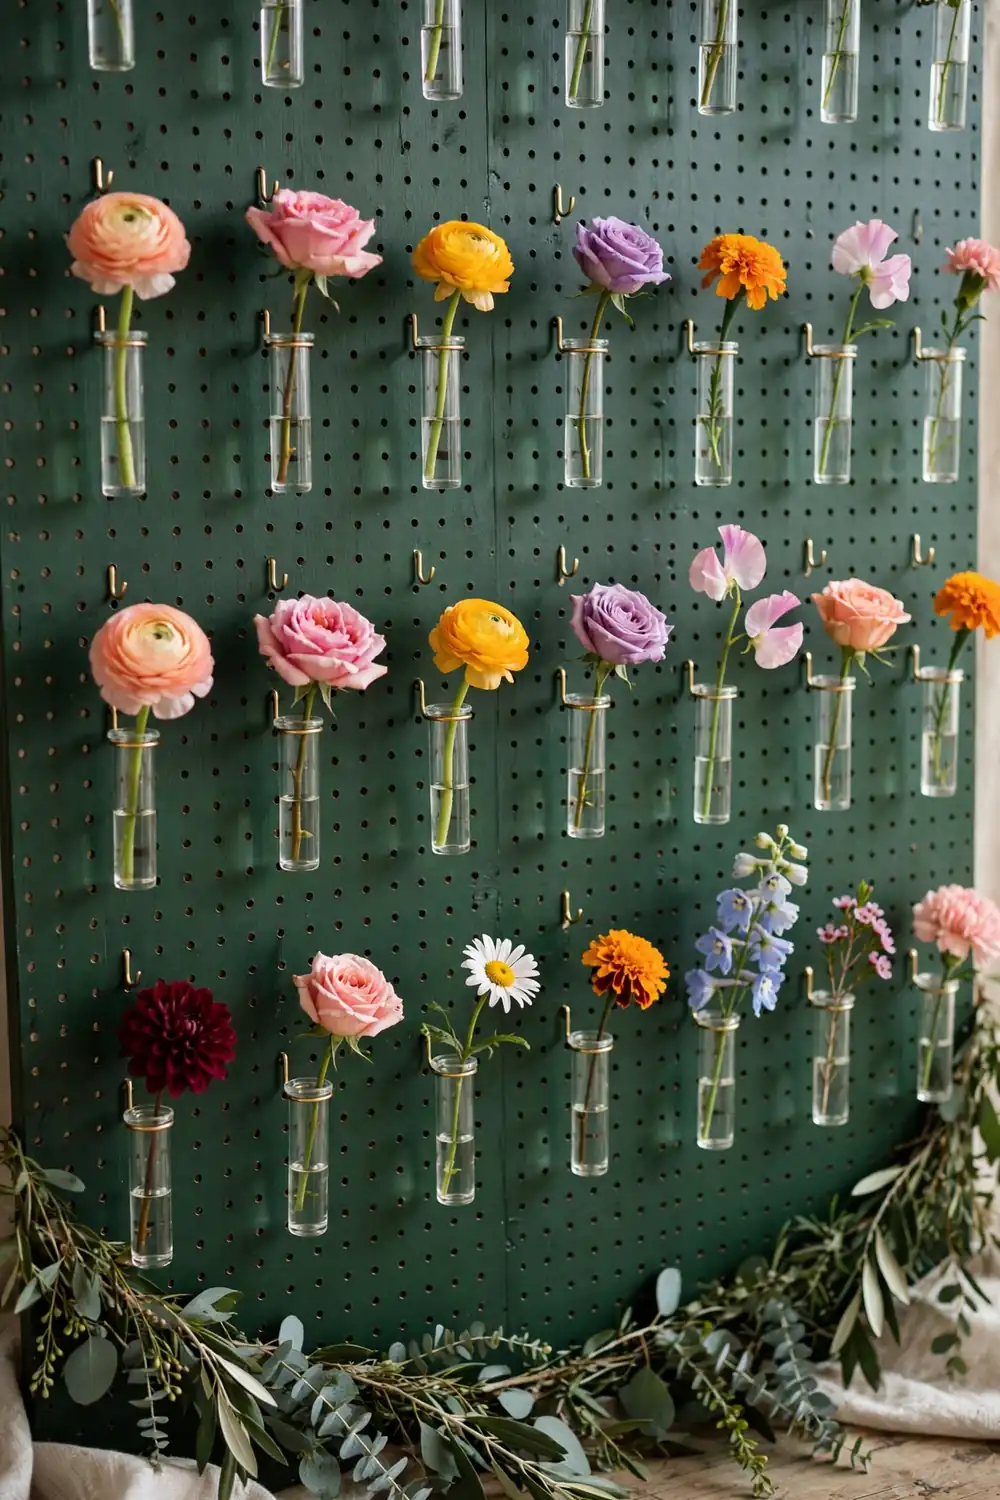
Bud vase pegboard wall

A painted pegboard wall (about 6 by 8 feet) fitted with small hooks, each holding a glass bud vase with a single stem. The wall works as a ceremony backdrop first, then guests take a vase home as a favor after the reception. Use 3-inch bud vases. Anything taller tips forward on the hooks. Styling tip: paint the pegboard a deep green or navy. The dark background makes every flower color pop in photos.

Dried Flower Bar

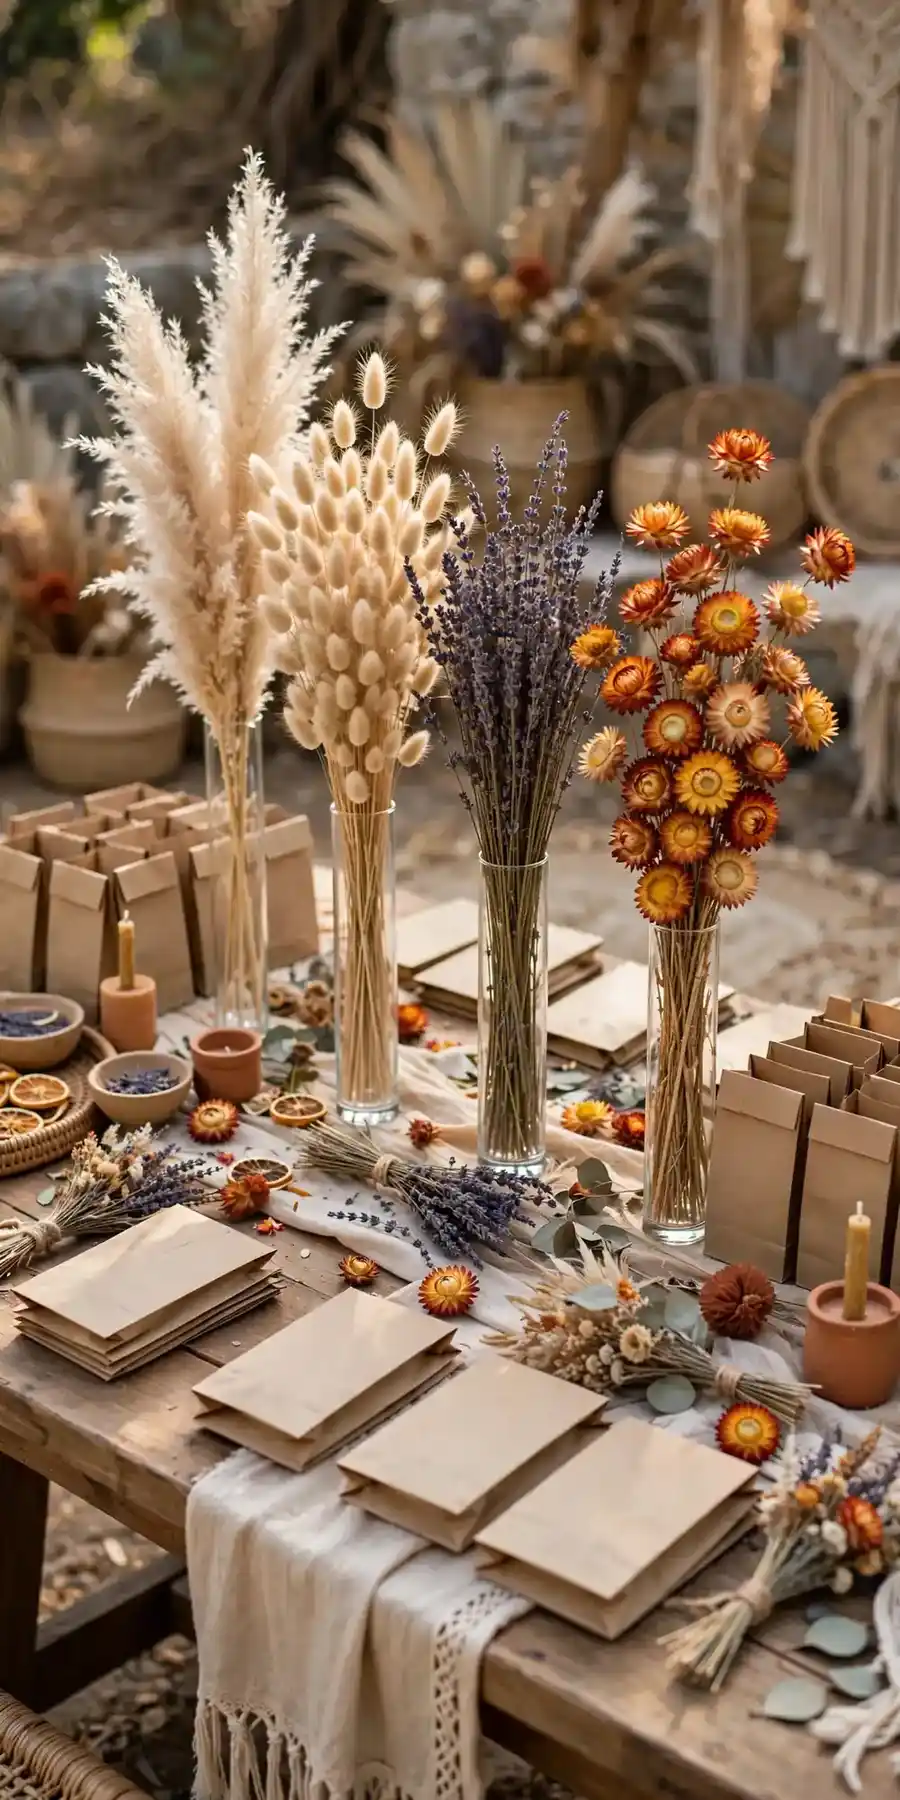
Dried flower bar

Baskets of dried pampas grass, bunny tails, dried lavender, strawflower, and preserved eucalyptus arranged on a table with paper bags. No water, no wilting, no stress. Dried flowers are also cheaper than fresh, often half the price per stem. This is the best option for outdoor summer weddings. Styling tip: keep the dried bundles in tall narrow vases rather than lying flat in baskets. Upright stems look abundant, while flat piles look picked-over by mid-evening.

Flower Crown Station

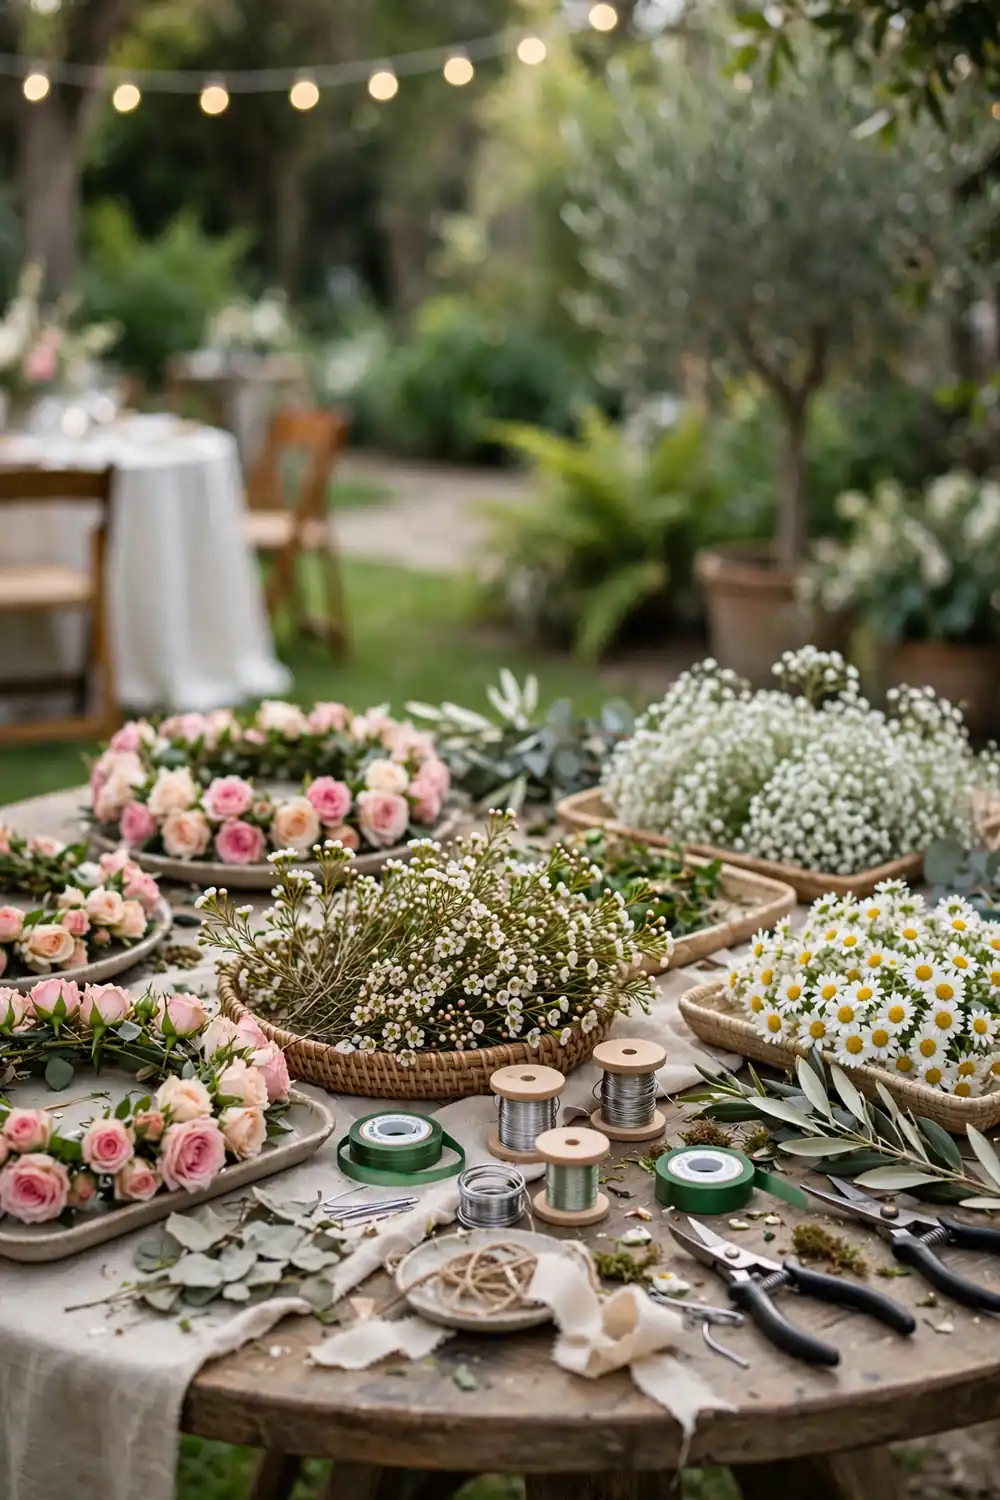
Flower crown making station

A round table with thin floral wire, floral tape, wire cutters, and trays of small-headed flowers: spray roses, waxflower, baby’s breath, and daisies. A friend or attendant shows guests the basic twist-and-tape technique. Small flower heads work best. Big blooms make crowns heavy and they slide off. Styling tip: pre-cut the wire into 24-inch lengths. Guests will not do it themselves, and the station stalls if they have to.

Perfume and Posy Pairing

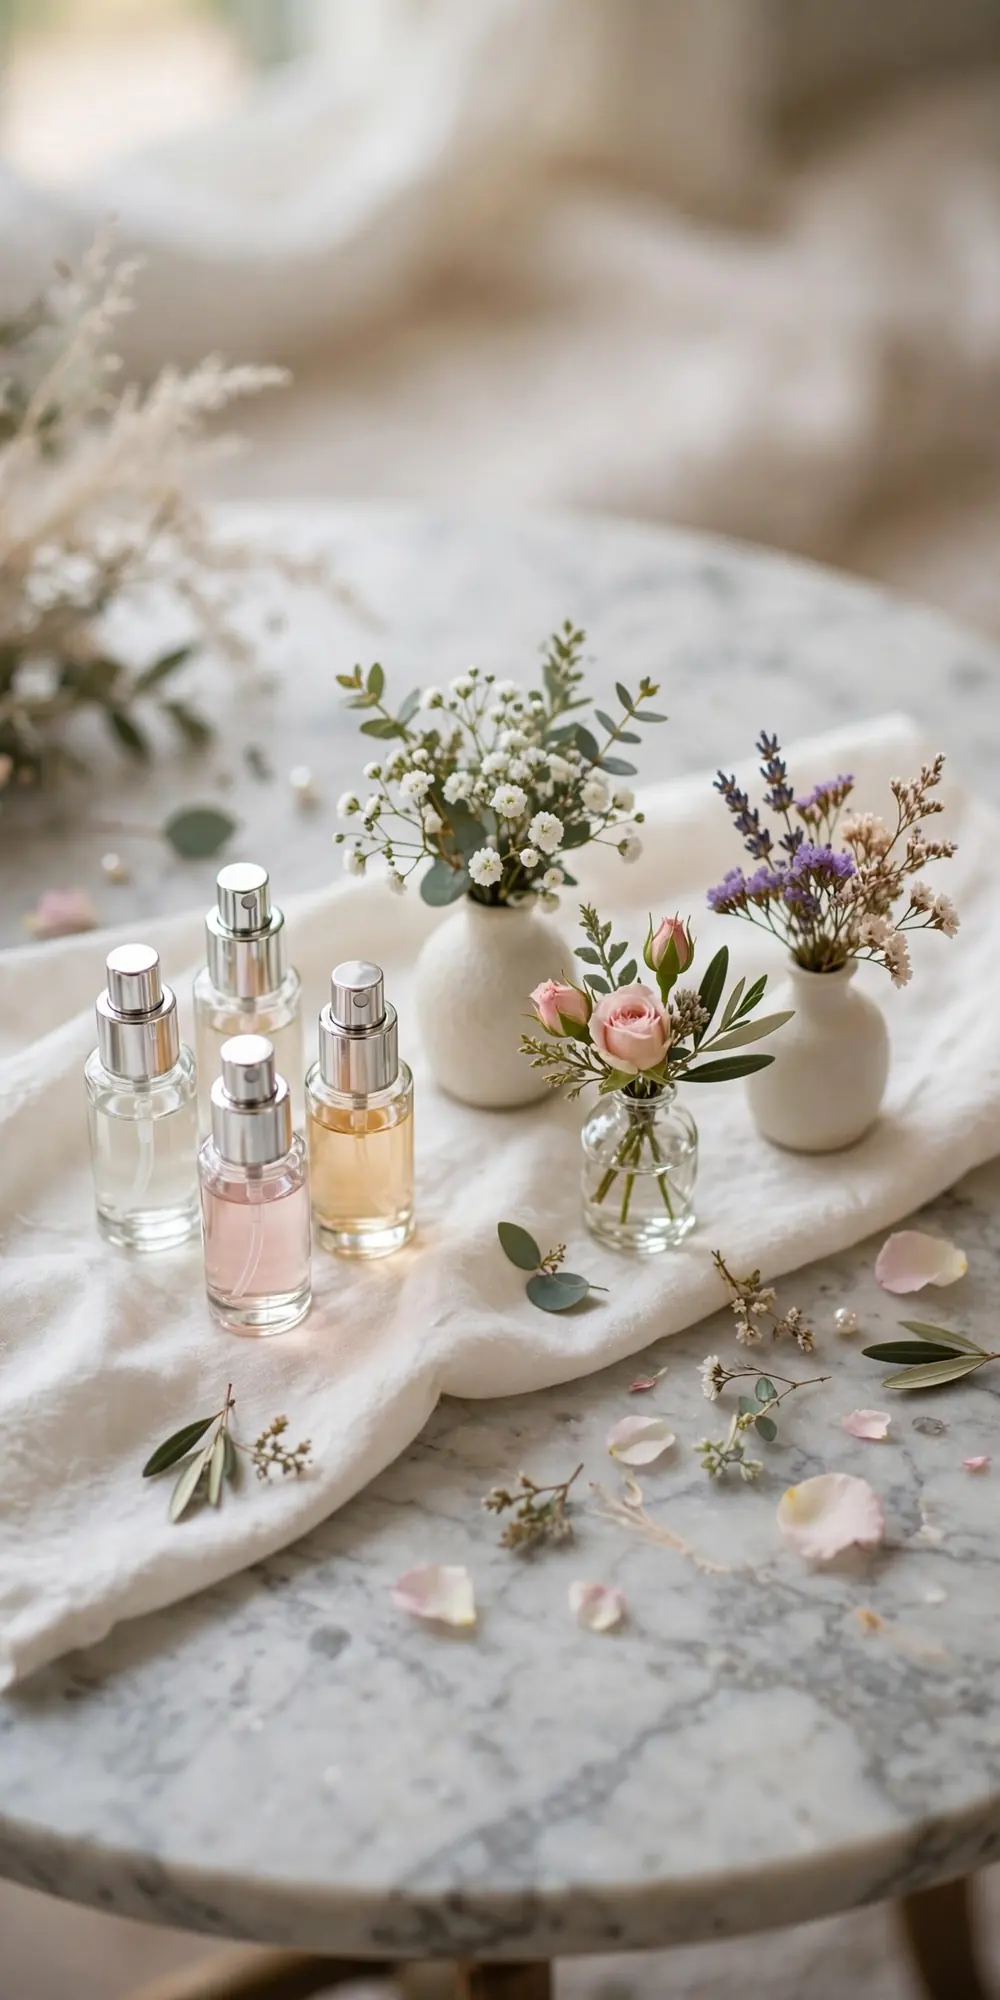
Perfume and posy pairing table

A small table pairing a perfume bar with mini posies. Three or four scent options in sample atomizers sit next to tiny bud vases, and guests match a scent to a flower to take both. The sensory combination is memorable, and the table smells incredible. Keep the posies to one or two stems so the table stays tidy. Styling tip: label each scent with a one-line mood note, like “citrus and morning light.” Guests choose faster when the scent has a story.

Pressed Flower Bookmark Bar

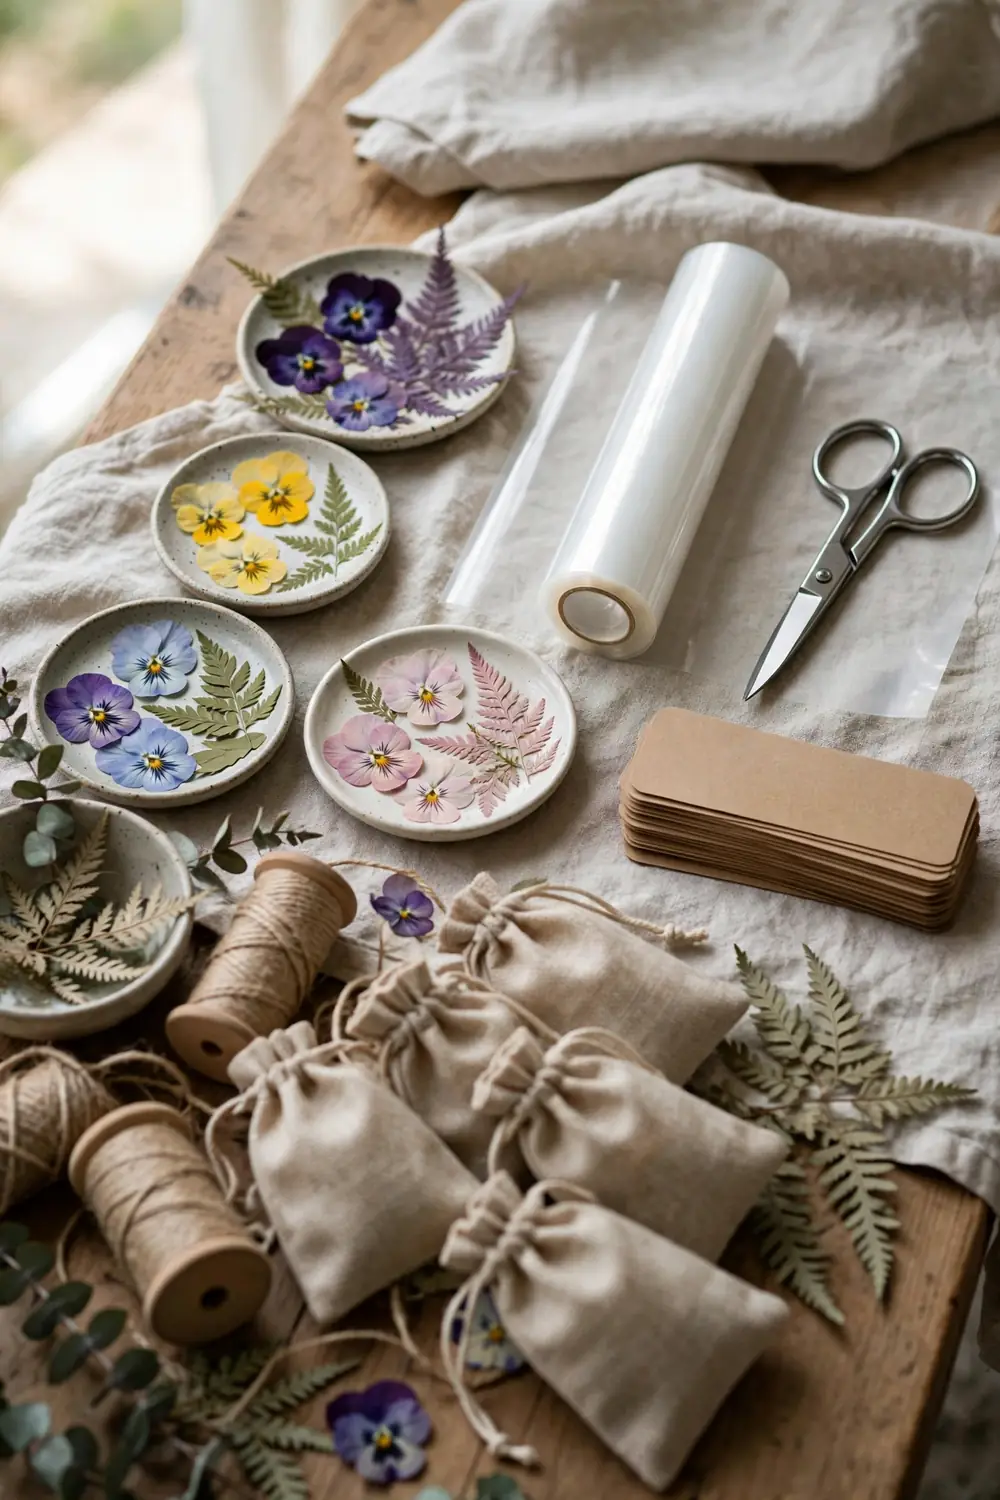
Pressed flower bookmark bar

A craft table with pre-pressed flowers, blank kraft bookmarks, clear contact paper, and scissors. Guests arrange pressed pansies and ferns on a bookmark, seal it, and take it home. Press the flowers at least two weeks ahead between heavy books. This doubles as a guest book alternative if you add a sign that says “press a flower, leave a wish” with a jar for notes. Styling tip: sort the pressed flowers by color into small dishes. Guests build prettier bookmarks when they can see the palette.

Hanging Amaranthus Picking Wall

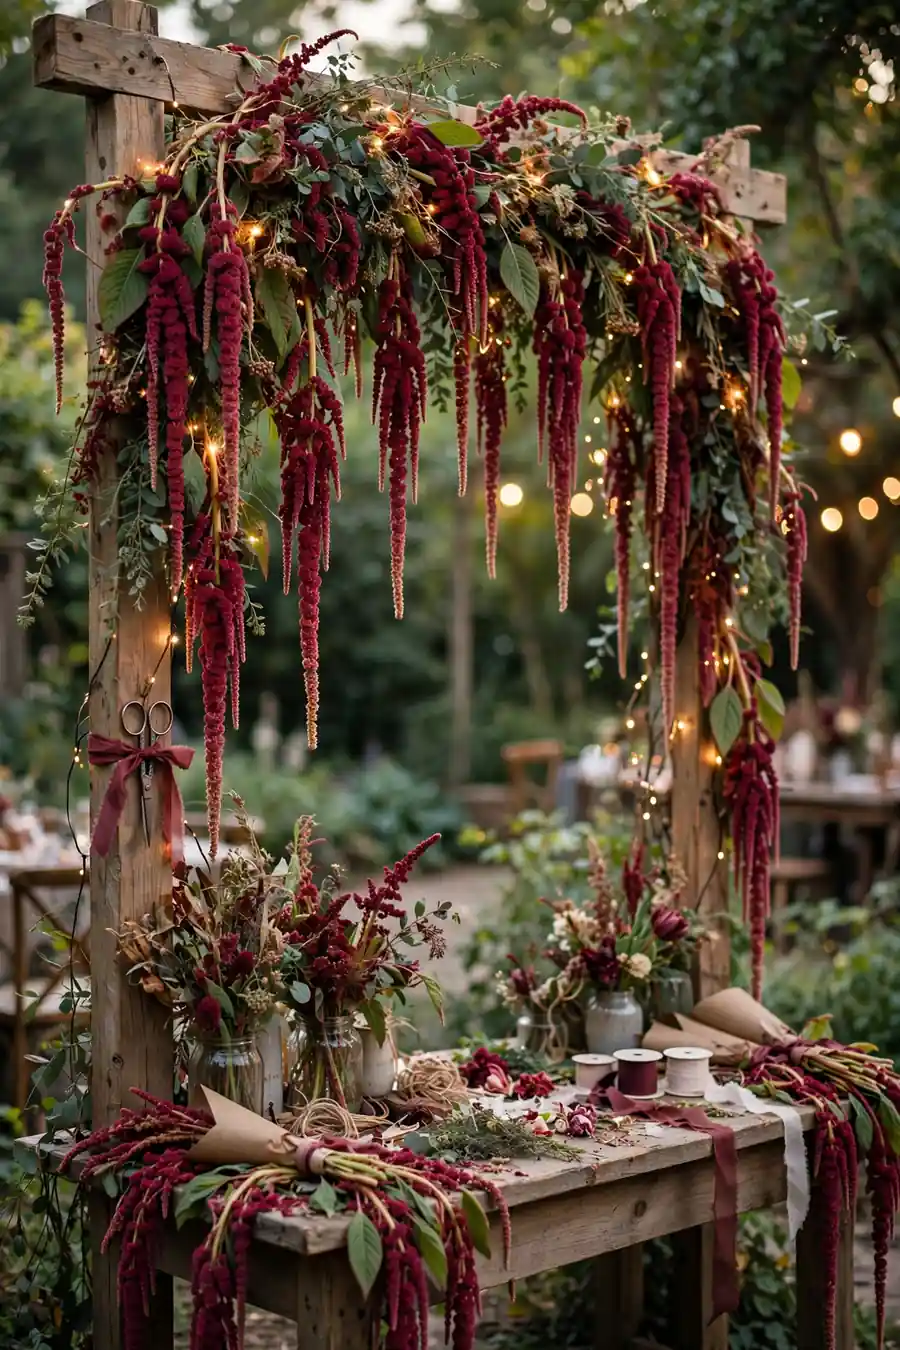
Hanging amaranthus picking wall

A frame draped with trailing red and green amaranthus, with small scissors tied to the frame on ribbons. Guests snip a stem or two for their lapel or hair. Amaranthus is sturdy, so it survives handling better than delicate blooms. Hang the frame at about 5 feet high so guests can reach without stretching. Styling tip: weave a few battery fairy lights through the amaranthus. The lights make the wall glow after sunset and draw guests over.

Herb and Flower Sensory Bar

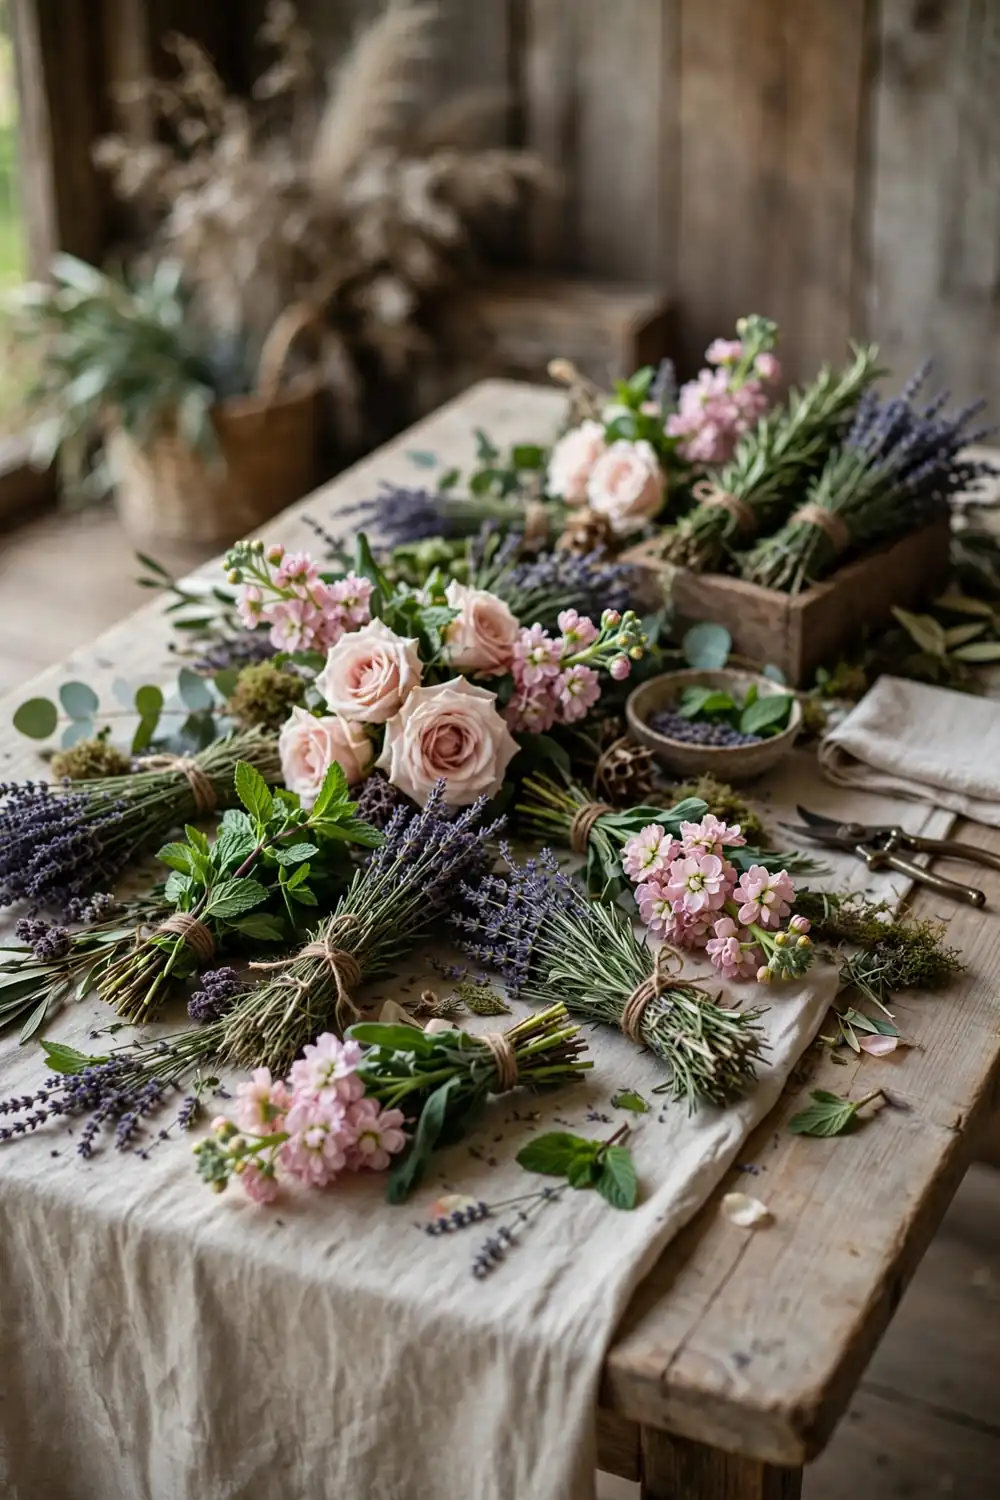
Herb and flower sensory bar

A bar mixing fragrant herbs (rosemary, lavender, mint) with roses and stock. Guests crush a leaf, smell it, and build a small fragrant bundle tied with twine. The scent is the point here, so choose herbs over showy flowers. Rosemary lasts for hours without water. Styling tip: add small cards naming each herb and one use, like “lavender: tuck behind your ear.” The cards start conversations and slow guests down at the table.

Single-Variety Color Block Bar

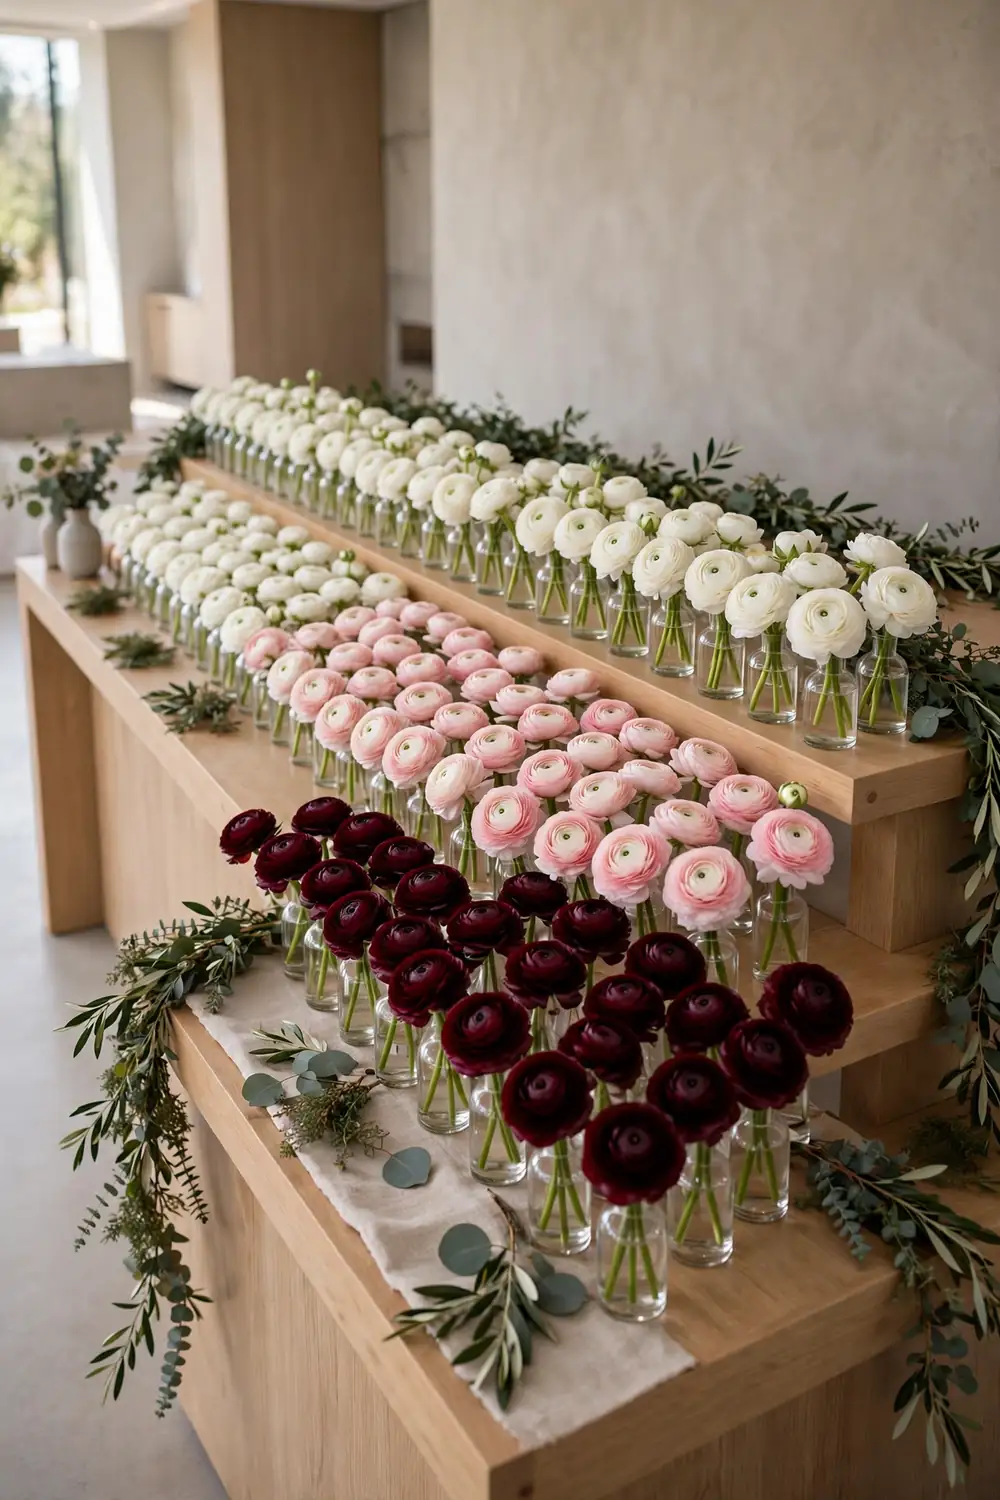
Single-variety color block flower bar

One flower, three colors. For example, ranunculus in white, blush, and deep burgundy, each color in its own row of vases. The color blocking looks striking and photographs like an art installation. Single-variety bars are also easier to order wholesale. You only negotiate one flower type. Styling tip: arrange the colors light to dark from left to right. The gradient reads as intentional design, not random buckets.

Boutonniere Building Bar

Boutonniere building bar

A small station just for the wedding party and close family: small blooms, greenery, pins, and floral tape to assemble boutonnieres on the spot. This works well during cocktail hour while the couple takes photos. Keep a sample boutonniere on display so guests can copy it. Most people have never made one. Styling tip: use magnetic boutonniere backs instead of pins. No one bleeds, no fabric gets holes, and they take ten seconds to attach.

Ceremony Arch That Becomes the Bar

Flower ceremony arch

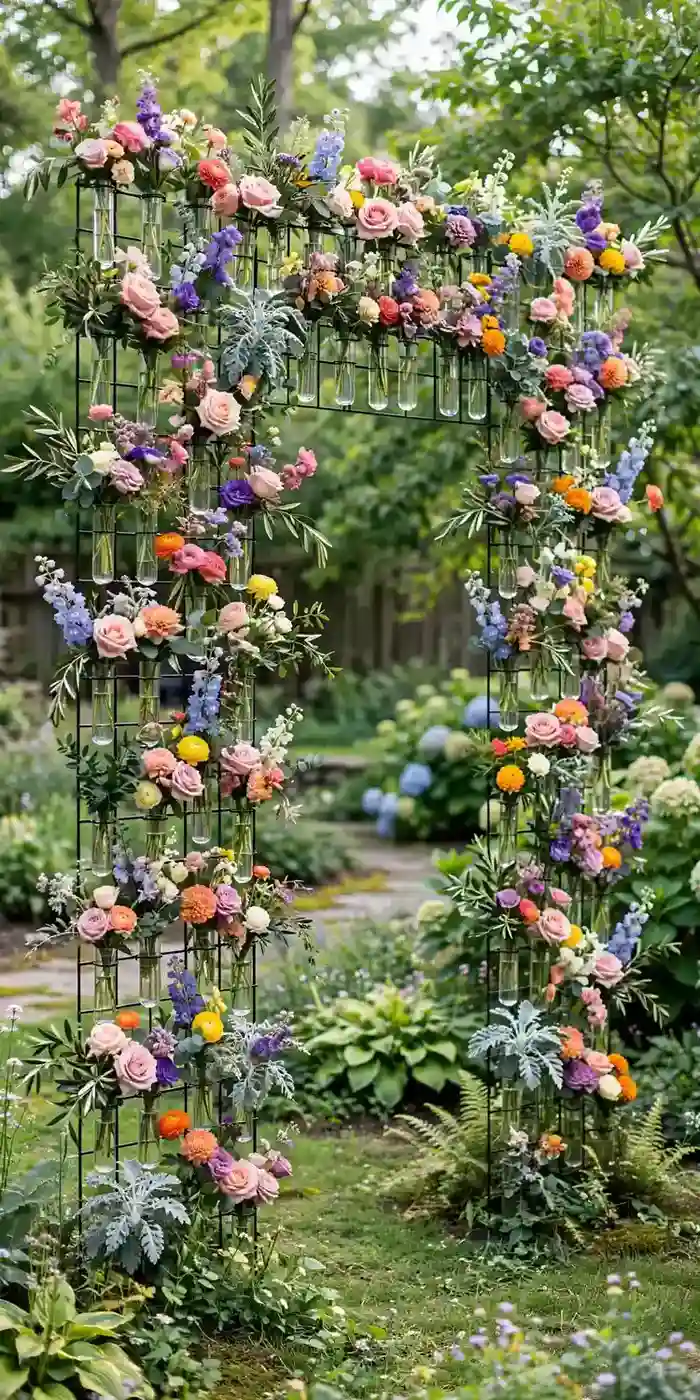
Build the ceremony arch from a grid wall covered in flowers in water tubes. After the ceremony, move the grid behind a table, add scissors and paper wraps, and it becomes the flower bar for the reception. You pay for the flowers once and use them twice. Use a freestanding grid wall on feet so it can be carried by two people. Styling tip: design the arch with picking in mind. Leave the lower two-thirds full and lush, since that is where hands will reach.

Whichever setup you choose, assign one person to tidy the bar once during the evening. A quick restock of water and a sweep of fallen petals keeps it photo-ready all night.

October 18, 2026 0 comments
0 FacebookTwitterPinterestEmail

Recent Posts

  • 11 Must-Have Moments for Your Wedding Video Shot List
  • 11 DIY Wedding Table Number Ideas
  • 11 Bridal Hair Vine Ideas With Curls and Waves
  • 11 Bridal Veil Styles and How to Choose Yours
  • 11 Wedding First Look Photo Ideas Full of Emotion

Keep in touch

Facebook Pinterest

Categories

  • Beauty
  • Decor
  • Designs
  • Jewelry & Accessories
  • Photography & Videography
  • Stationery
  • Themes
  • Wedding Cakes
  • Wedding Outfits
  • Facebook
  • Twitter
  • Disclaimer
  • Privacy Policy
  • Terms and Conditions
  • About Us

© 2026 wedblooms.com | Designed by Wed Blooms


Back To Top
Wed Blooms
  • Home
  • Designs
  • Decor
  • Beauty
  • Stationery
  • Themes
  • Photography & Videography
  • Wedding Cakes
  • Wedding Outfits
  • Jewelry & Accessories